💾 Setting Up File Storage
For online print orders, customers often need to upload their artwork or design files.
PriceCal allows you to integrate file uploads directly into your system by linking to your WordPress or FTP storage — ensuring every uploaded file is securely stored and easily accessible.
🔹 What Is the File Storage Component?
The File Storage Component defines where customer-uploaded print files are saved when orders are placed through your Printalogue or website.
It lets you connect your system to a storage platform like WordPress or FTP, depending on your setup.
💡 This is essential for managing customer artwork and ensuring seamless file transfer between your ordering system and production workflow.
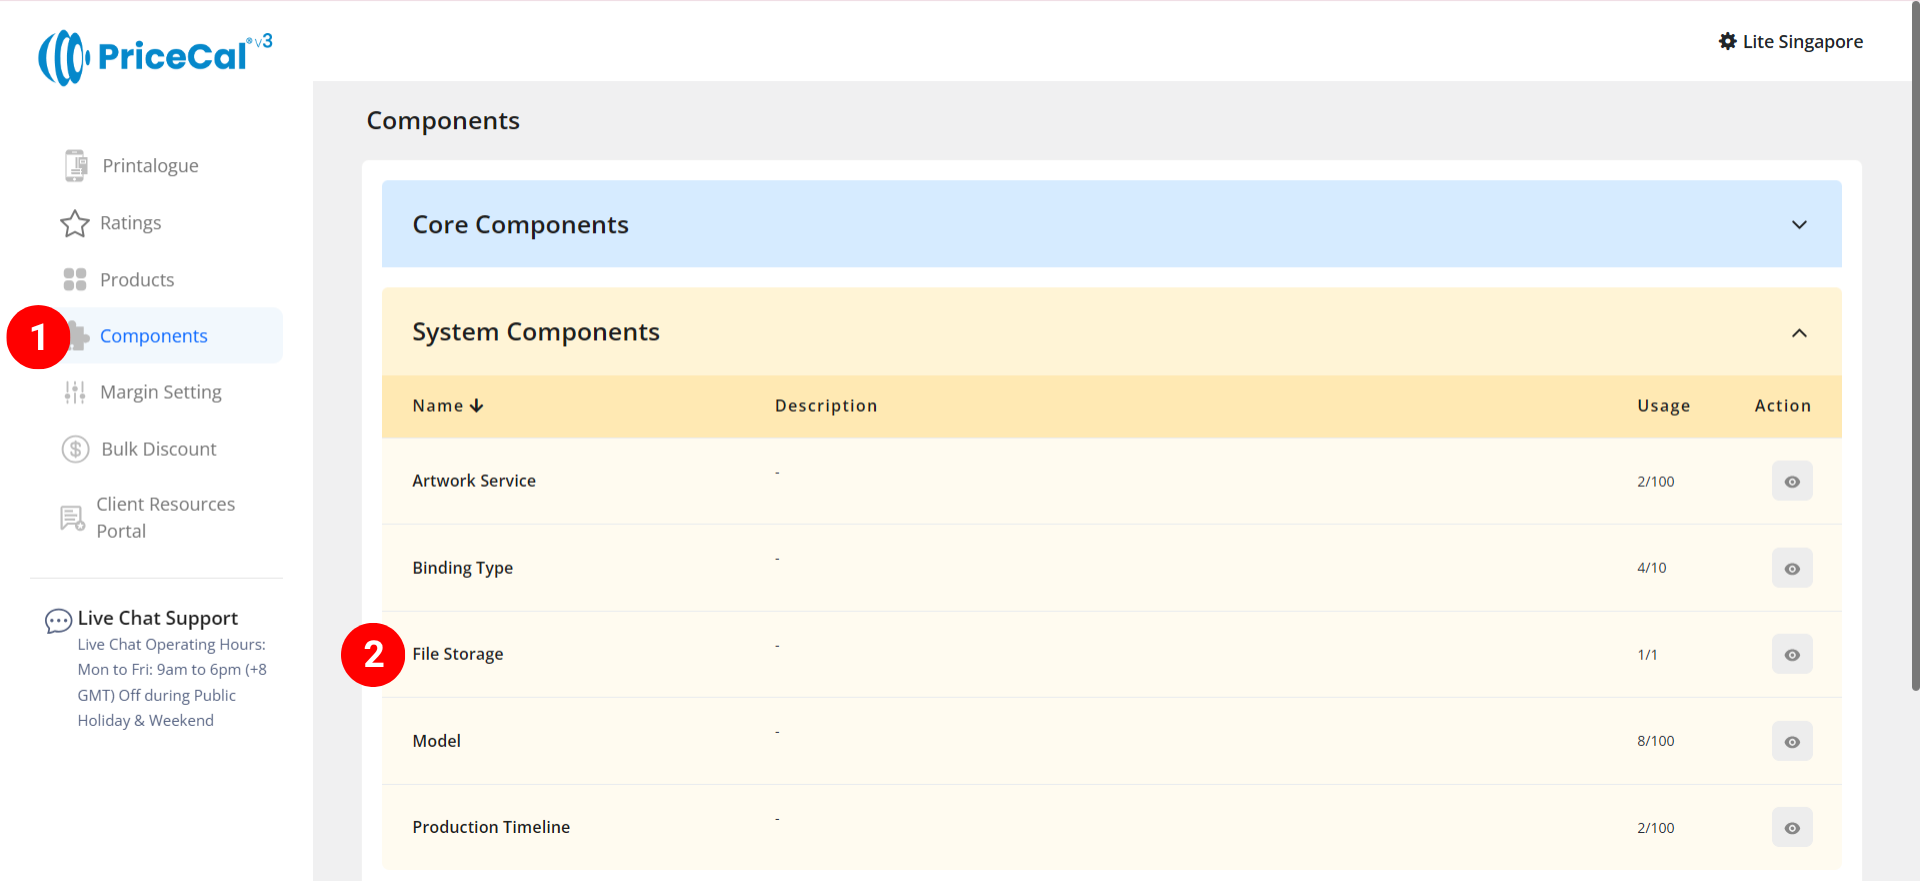
 Navigating to File Storage Setup
- Go to Component dashboard
- Click File Storage category
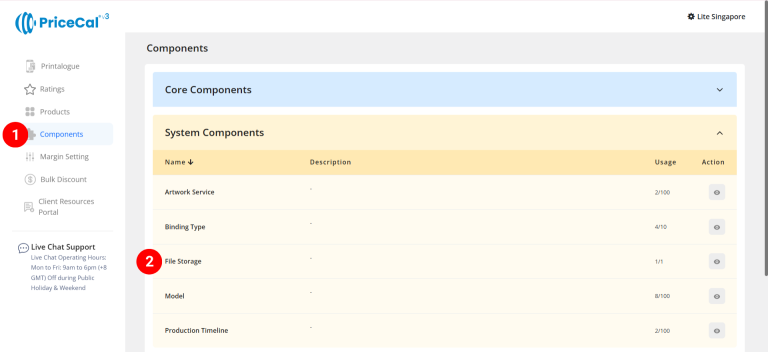
- Add file storage type
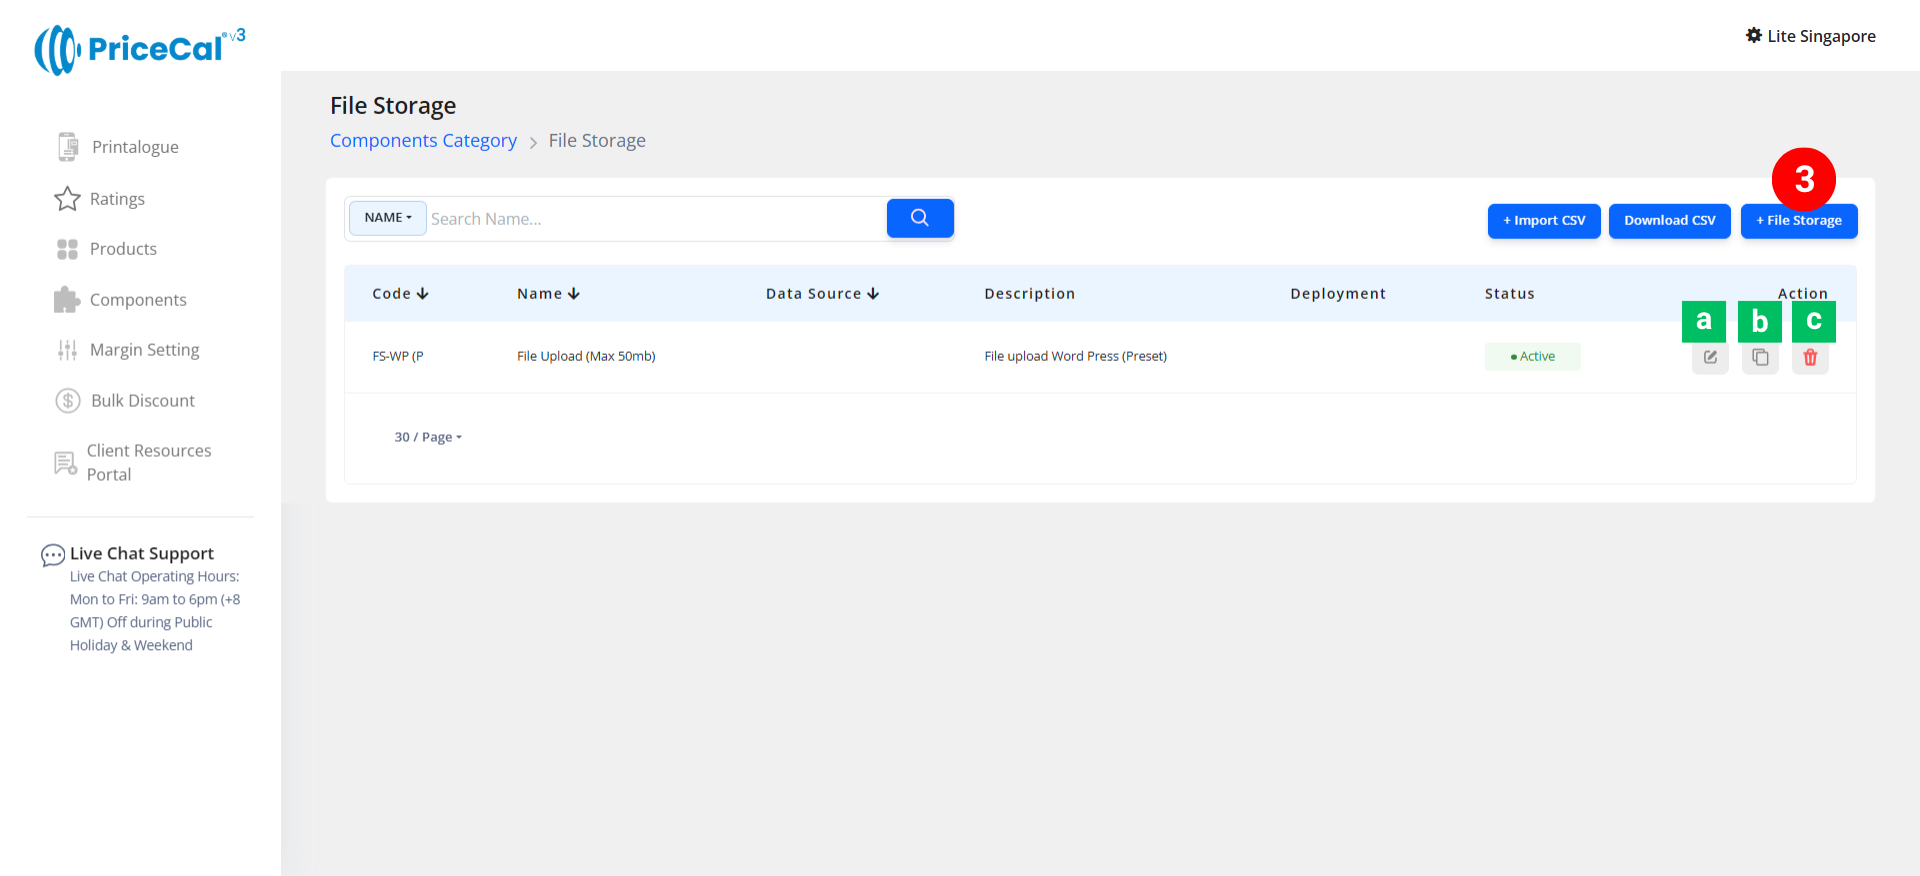
Edit [a]: modify existing components.
Duplicate [b]: clone a component setup to reuse and create new.
Delete [c]: remove unused component.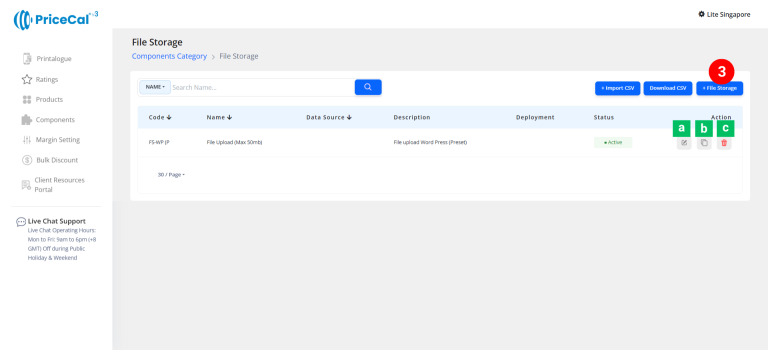
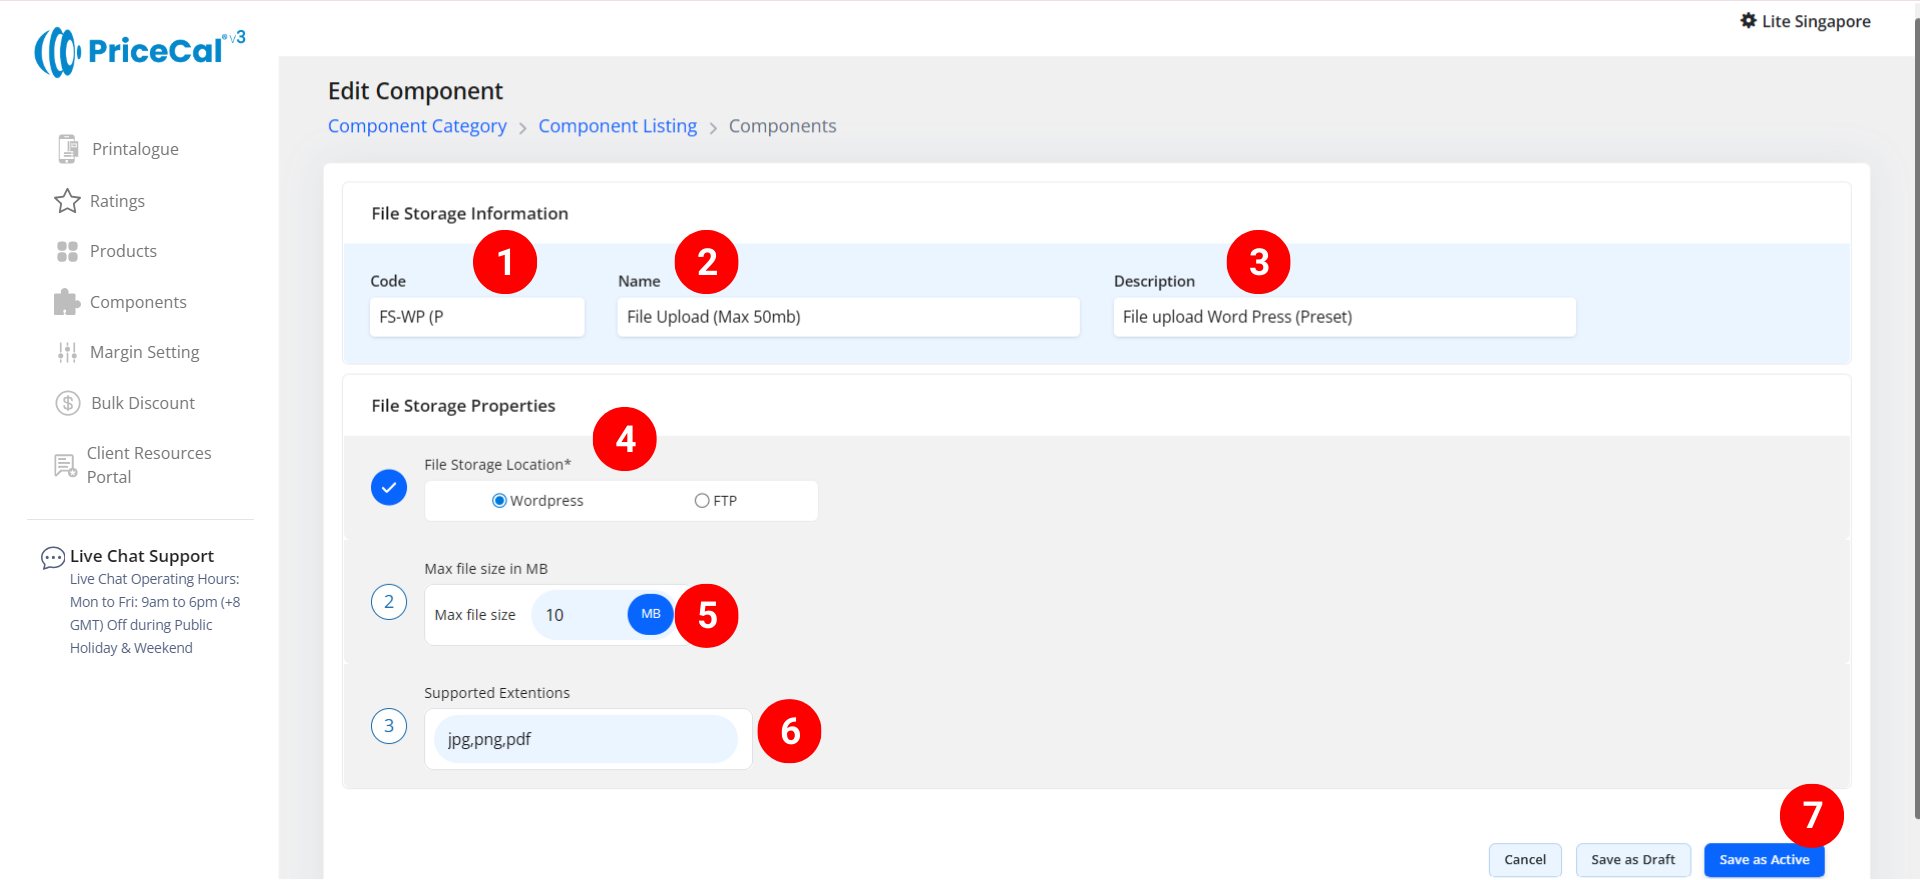
1️⃣ Create a WordPress File Storage Component – wordpress-base website
Step-by-Step
-
Put a unique code (up to 8 units)
-
Enter the file storage name. e.g. File Upload
-
Enter the component description.
💡 Tips: Add a short note describing what binding applies to this product. Example: “wordpress storage” -
Select the file storage location
– WordPress: Files will upload directly to your WordPress storage when integrating PriceCal with your WordPress-based website. - Set a maximum file size limit to restrict the size of files uploaded by customers.
-
Set a file format to restrict the format of files uploaded by customers.
-
Click “Save as Active” to save your file storage setup.

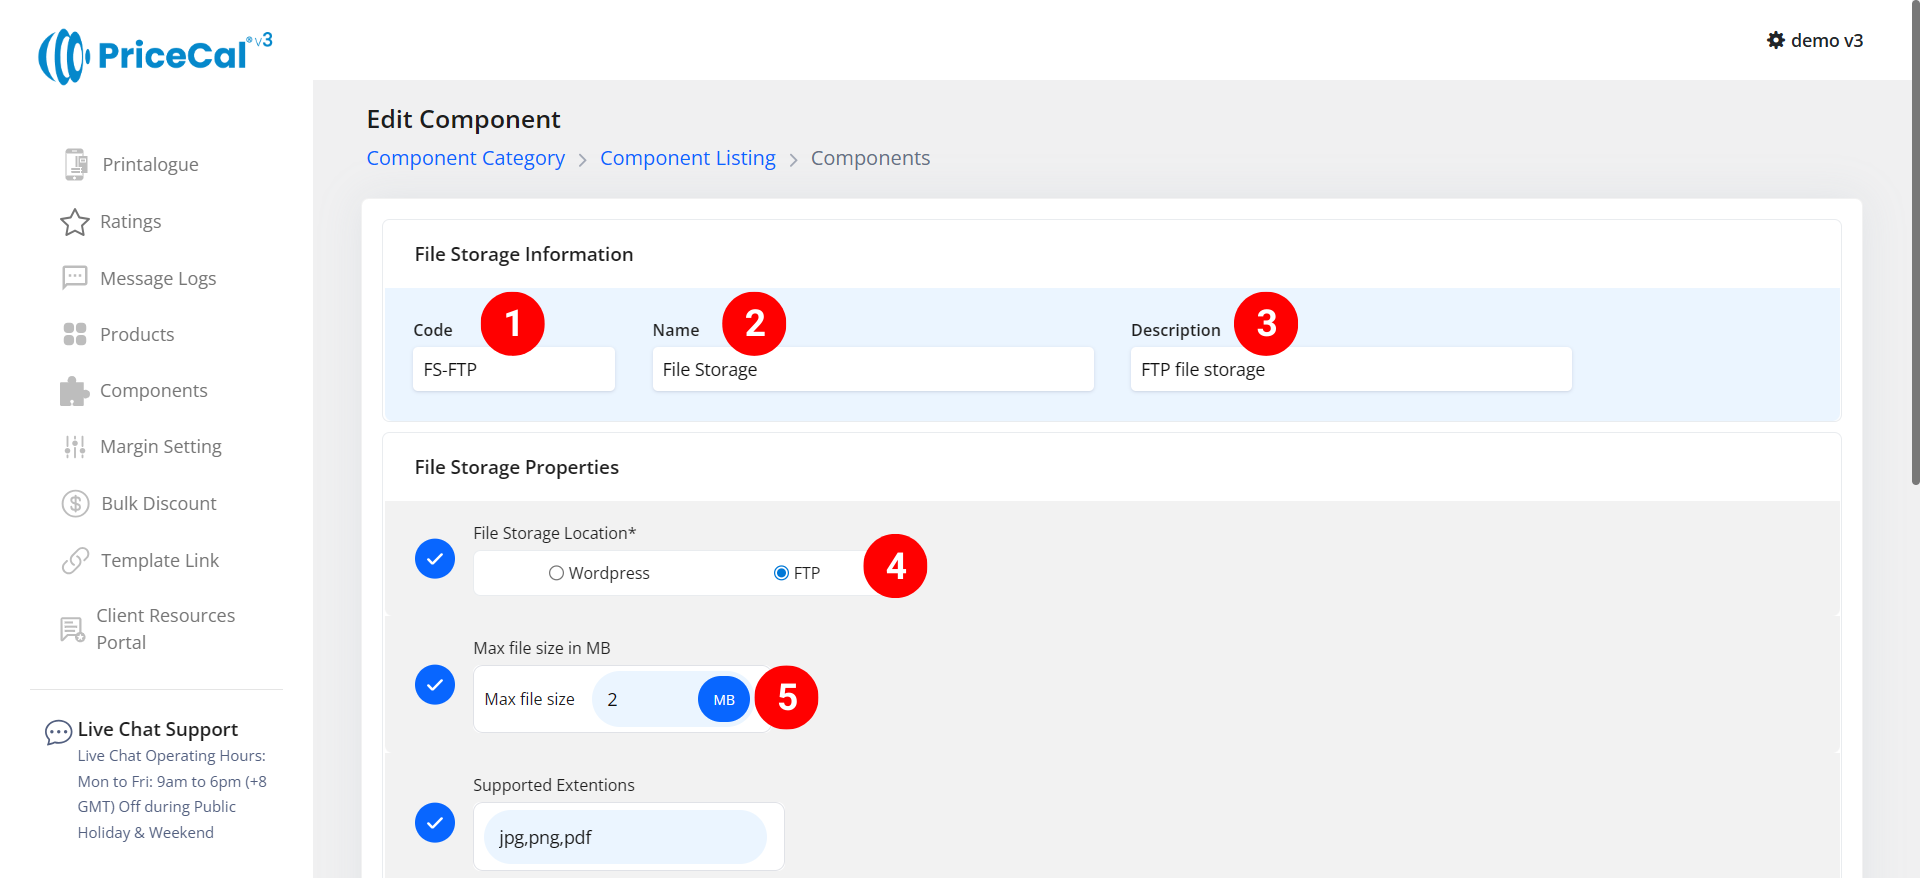
2️⃣ Create a FTP File Storage Component – Printalogue & wordpress-base website
Step-by-Step
-
Put a unique code (up to 8 units)
-
Enter the file storage name. e.g. File Upload
-
Enter the component description.
💡 Tips: Add a short note describing what binding applies to this product. Example: “FTP storage for artwork upload” -
Select the file storage location
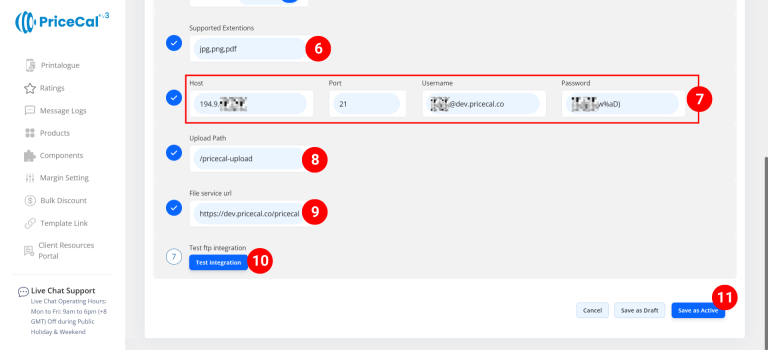
– FTP: Files will upload to your FTP account. To enable this, you need to have an FTP account to link and allow customers to upload files through Printalogue and WordPress websites.
How to create an FTP account in Cpanel? - Set a maximum file size limit to restrict the size of files uploaded by customers.

-
Set a file format to restrict the format of files uploaded by customers.
- Enter your hosting and FTP account inform.
-
Enter your Upload Path. Example: /pricecal-upload , your file URL will be

- Enter yor file server URL (domain). Example: https://dev.pricecal.co

-
Click the “Test integration” to make sure link succeeded.
-
Click “Save as Active” to save your file storage setup.

⚙️ How PriceCal Uses File Storage
Once configured:
-
When a customer uploads artwork during checkout, PriceCal sends the file to your chosen storage (WordPress or FTP).
-
The system automatically records the file link in the order details.
-
Admins and staff can download or review the uploaded files directly from the order management interface.
✅ This ensures that all customer files are properly saved, organized, and retrievable at any time.
🎯 Why This Setup Is Important
Configuring File Storage allows your system to:
-
✅ Automatically save all uploaded artwork files
-
✅ Keep files organized and secure
-
✅ Prevent missing uploads during checkout
-
✅ Simplify access for production and admin teams
✅ Next: Test the Upload Integration
1️⃣ After setting up your WordPress File Storage:
- Go to your WordPress website product.
- Try uploading a test artwork file.
- Verify that the file appears in your selected storage (WordPress).
- Check that the order includes a download link to the file.
2️⃣ After setting up your FTP File Storage:
- Go to your Printalogue product or WordPress website product.
- Try uploading a test artwork file.
- Verify that the file appears in your selected storage (FTP).
- Check that the order includes a download link to the file.