🧩 Setting Up Printing Cost (SC-Item)
The SC-Item product type is designed for item-based printing — such as T-shirts, mugs, tote bags, keychains, or any physical merchandise.
Unlike sheet or area-based products, SC-Item uses a unique setup that links option names (printing types) and option contents (size or location variations).
🔹 How SC-Item Printing Cost Works
-
The option names (like Print Side or Item Size) are created under the Printing Cost category.
-
The option contents (like Front, Back, Large, Small) are defined under the Printing Size category.
-
Finally, these two must be linked together — so PriceCal knows which print cost applies to which option.
💡 Example:
If you’re setting up T-shirt printing —
“Print Side” (Front / Back / Both Sides) goes under Printing Cost,
while “Front”, “Back”, and “Both Sides” are created as printing sizes and linked back.
This separation allows PriceCal to calculate cost per specific model option accurately.
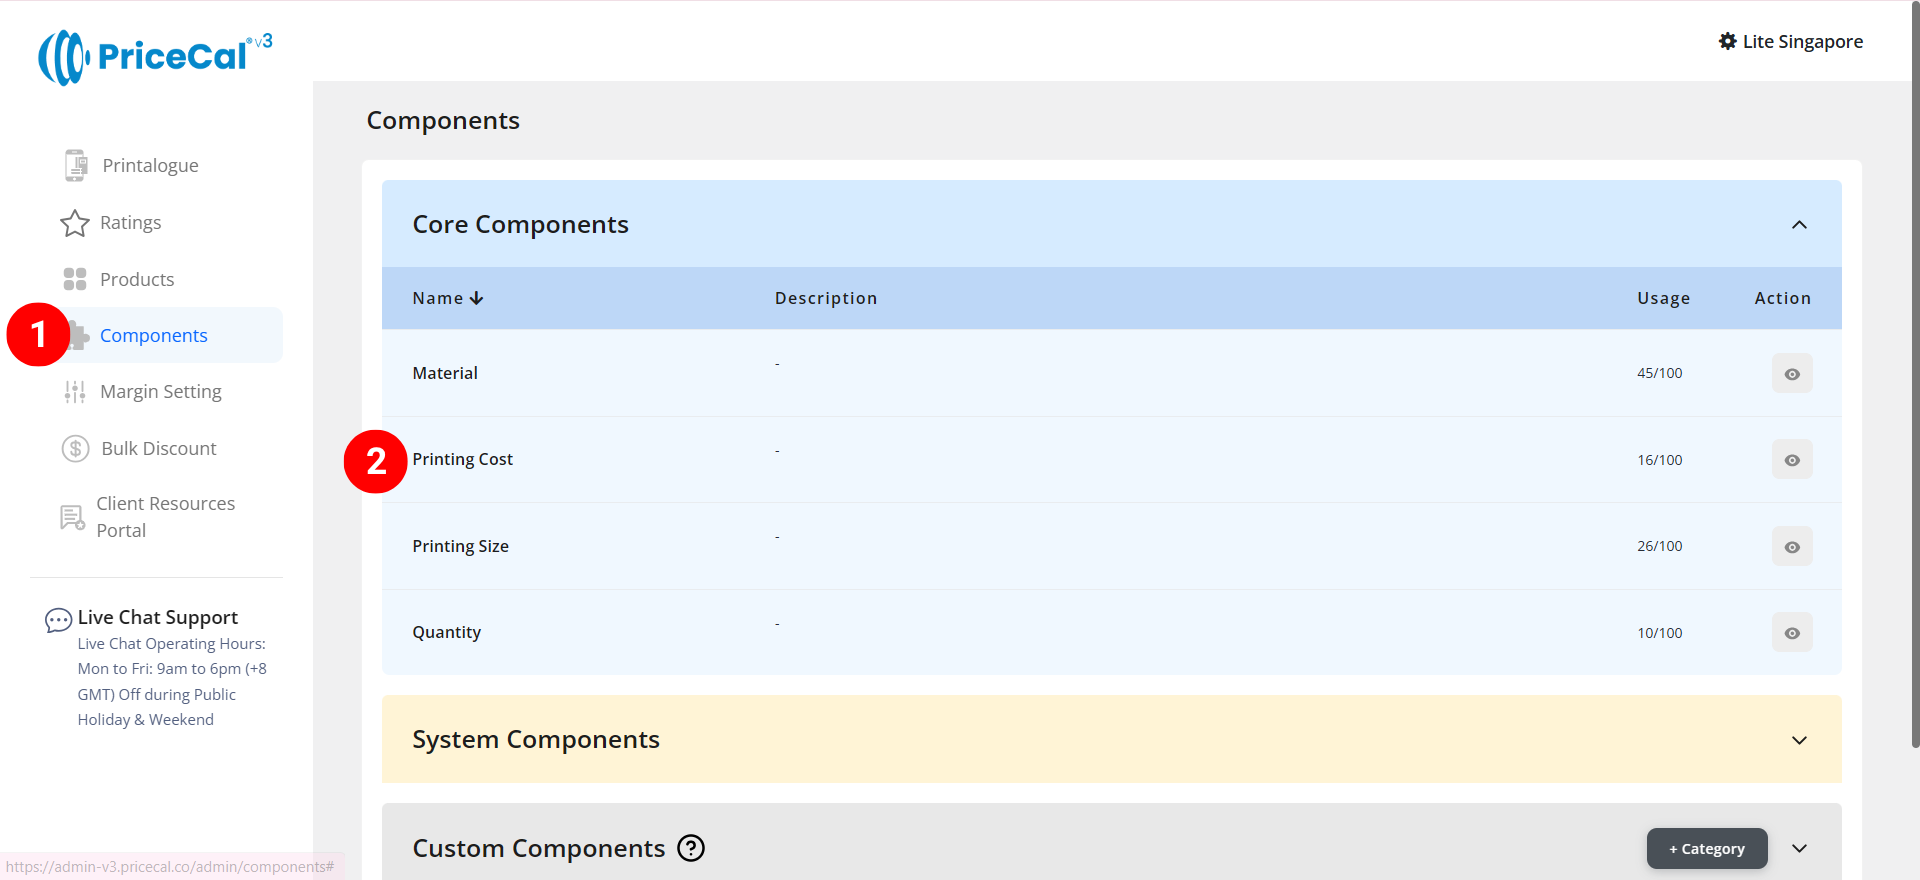
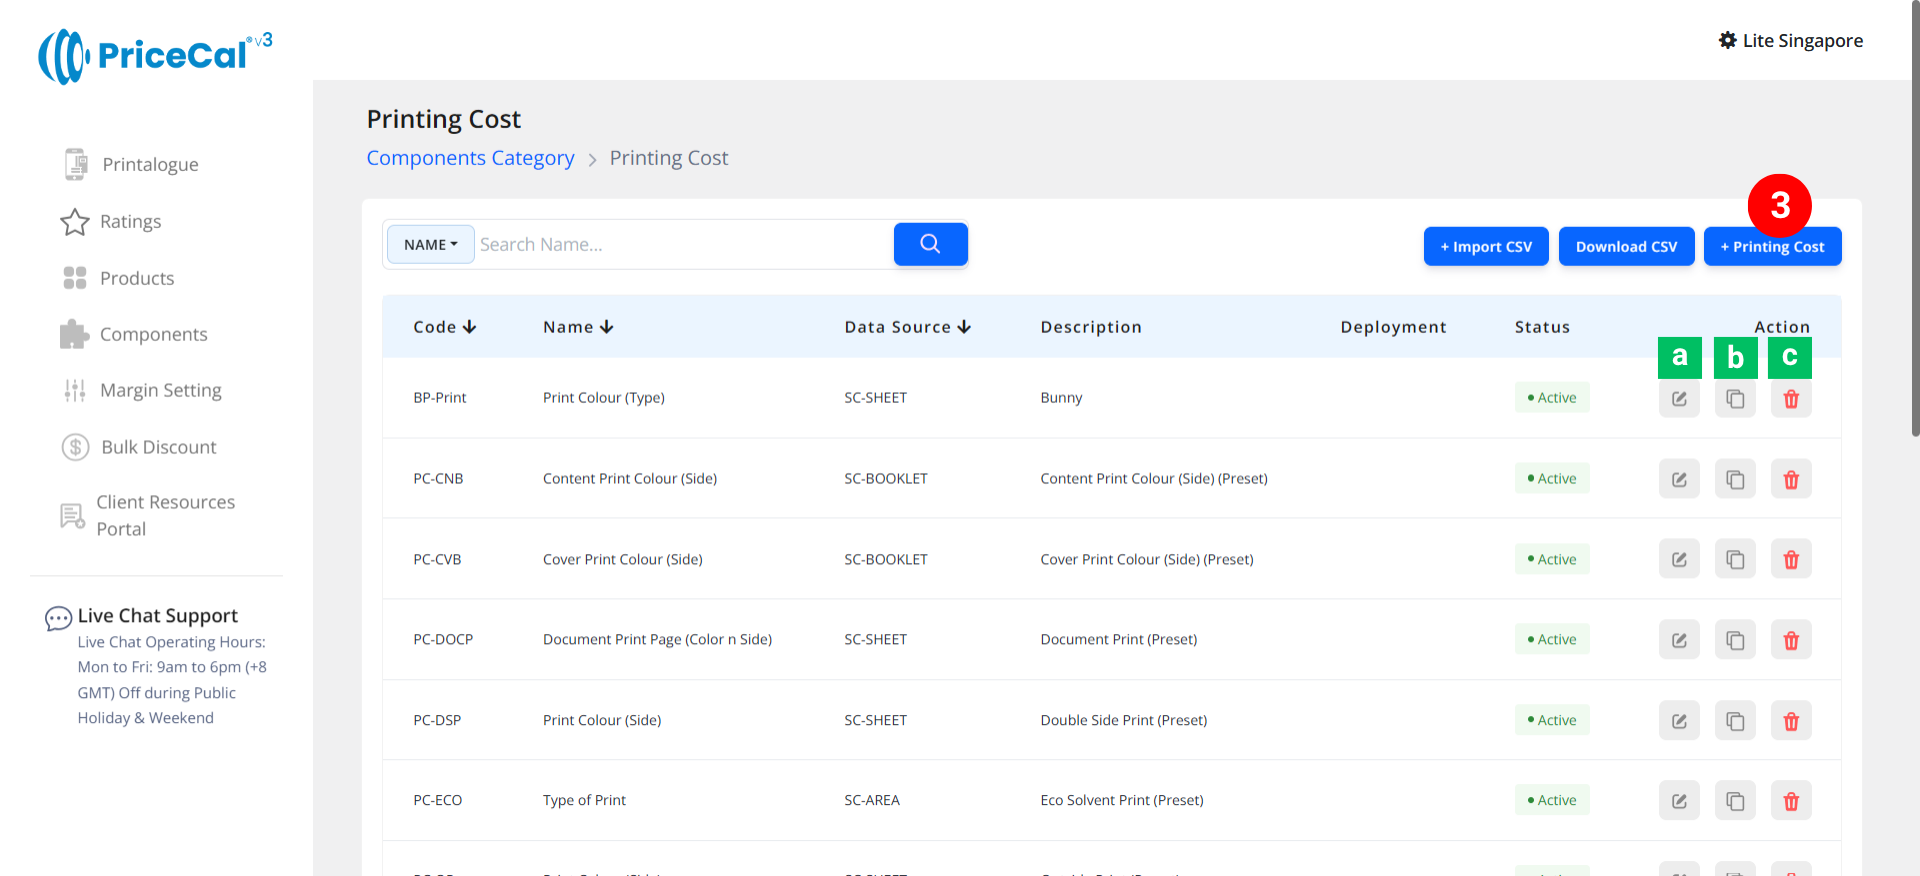
🧭 Navigating to Printing Cost Setup
- Go to Component dashboard
- Click Printing Cost category

- Add Material
Edit [a]: modify existing components.
Duplicate [b]: clone a component setup to reuse and create new.
Delete [c]: remove unused component.
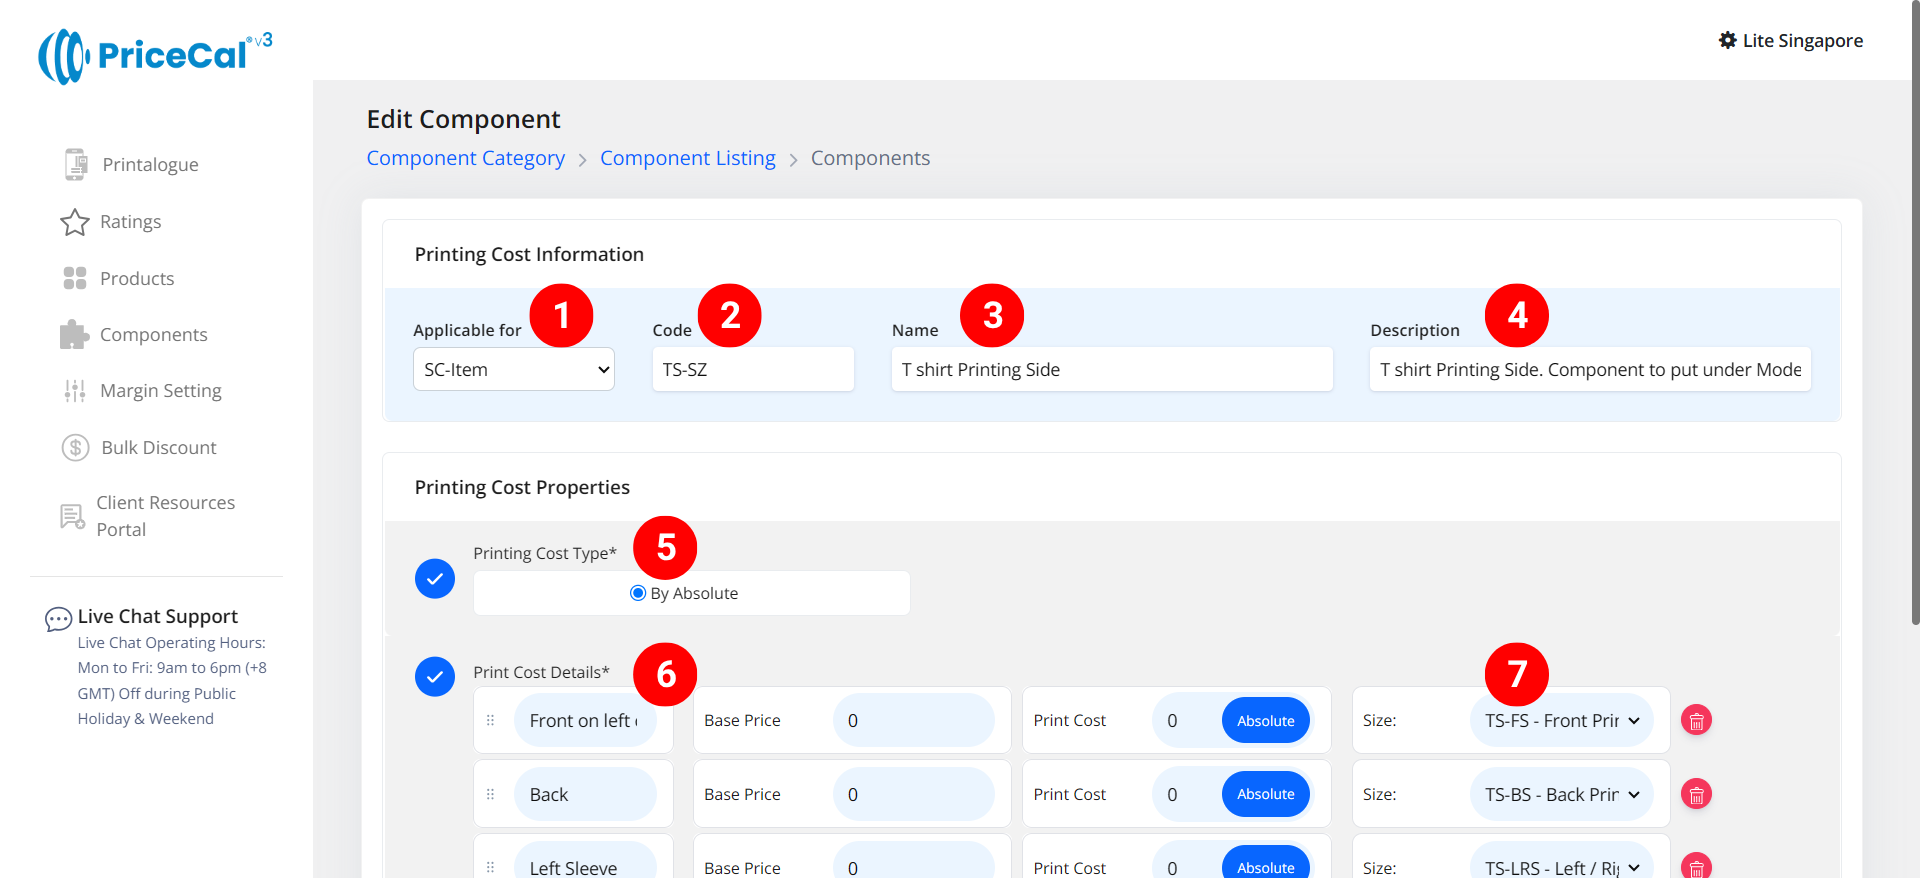
🧱 Create an Item-Based Printing Cost (SC-Item)
Step-by-Step
-
select “SC-Item”
-
Put a unique code (up to 8 units)
-
Enter the component name. Refer to the product’s print specifications, e.g. “T-shirt Print Side”, “Mug Print Specs”, or “Puzzle Model.”
-
Enter the component description. (💡 Note: Add a short note describing what options this printing cost has (e.g., “Front / Back of shirt print” or “Print Area / Colour of mug”)
- Select “By Absolute” in Printing Cost Type. (💡 Note: Calculates the print cost per piece, multiplying the total print quantity by a per-piece rate. (print quantity x print cost per absolute)
-
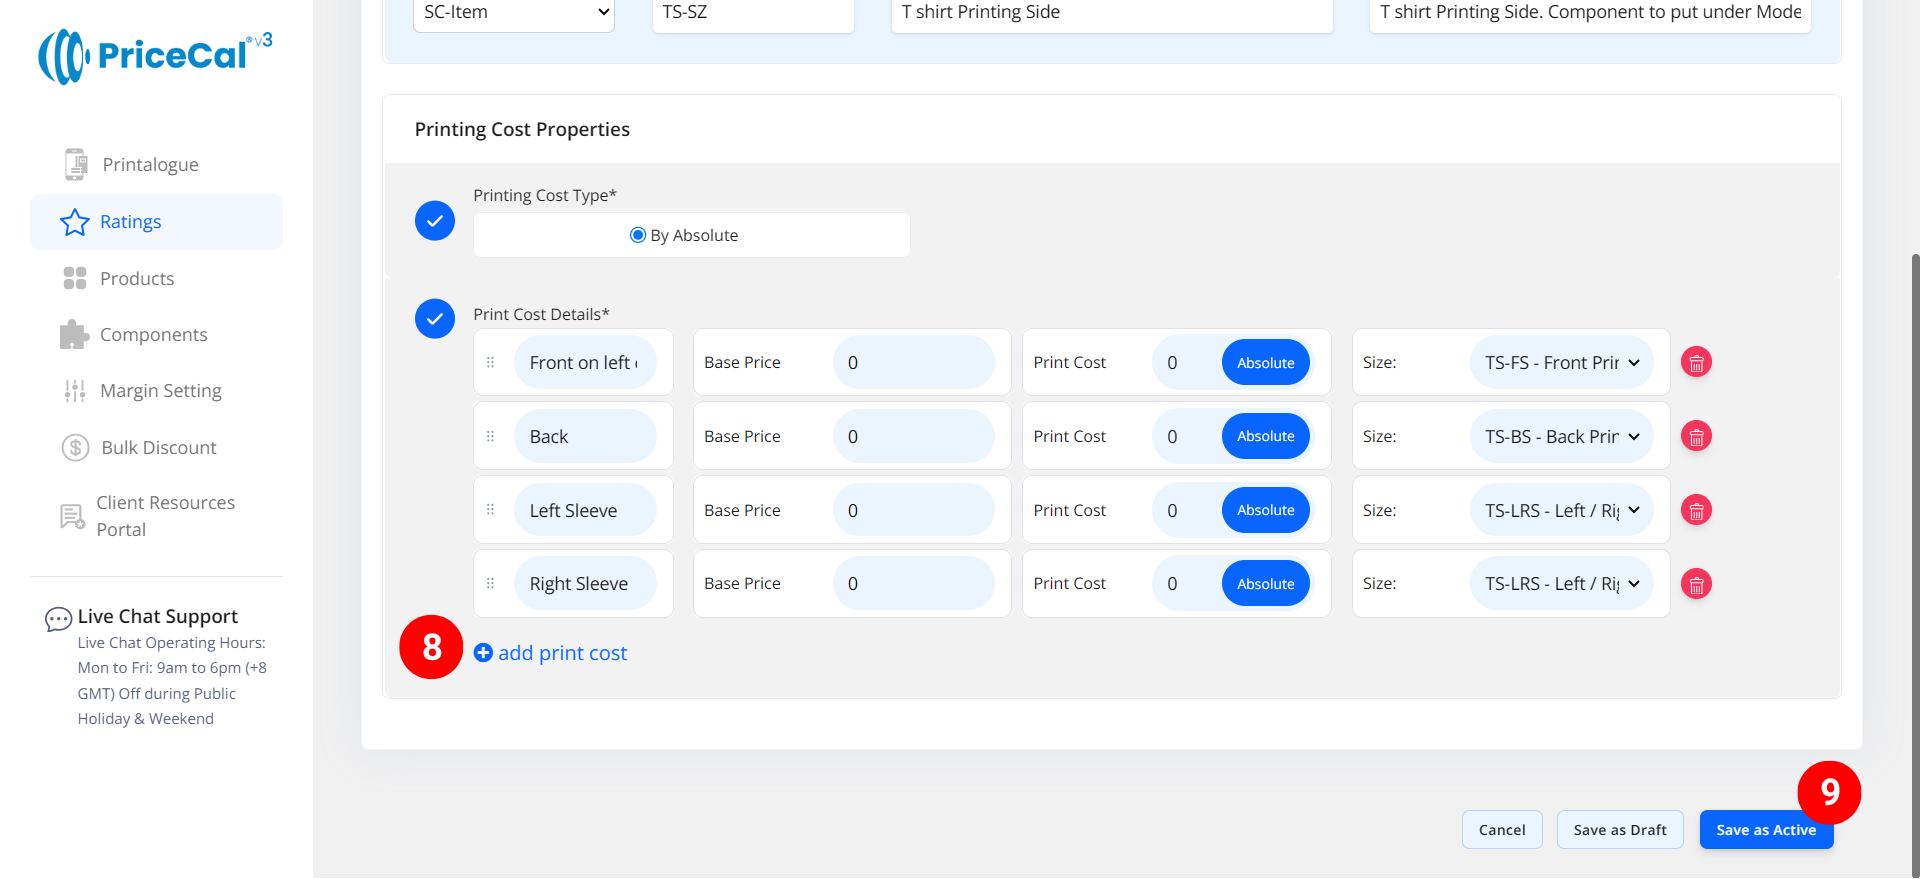
Enter the print cost detail
– Option Name: We need to put Option label name shown to customer (e.g., “Type of Print”, “Print Area”, “Item Size”)
– Base Price: One-time setup or startup fee before any per-sheet cost applies.
– Per Absolute: Cost per piece of print quantity
💡 Tips:If you’ve already added per-piece cost inside the Printing Size (Specs) component, you can leave the cost field empty here to avoid double-charging. - Link the Size (specifications in the SC-Item printing size) correctly to their respective option label names.

-
Add print cost if you have other options available for this product model to let your customers choose from.
-
Click “Save as Active” to save your component setup.

⚙️ How PriceCal Calculates SC-Item Printing Cost
When a customer orders:
-
The system reads which option and size combination was selected.
-
It looks up the matching Printing Cost and Printing Size link.
-
It multiplies Cost per Absolute × Quantity, then adds any Base Price.
-
Displays the total print cost automatically in real-time.
✅ This ensures accurate cost calculation for each product variation — ideal for multi-option merchandise like T-shirts, mugs, and apparel.
🎯 Why This Setup Is Important
A proper SC-Item setup helps your system:
-
✅ Calculate costs precisely per product model
-
✅ Handle multiple item variations and options
-
✅ Avoid double-charging between cost and spec levels
-
✅ Maintain consistent profit tracking across merchandise
Together with Material, Printing Size, and Quantity, the SC-Item Printing Cost ensures a flexible yet accurate pricing flow for product-based printing businesses.
✅ Next: Configure Your Item Print Sizes and Quantity
Once your SC-Item Printing Cost setup is complete, proceed to define Printing Sizes (Options) and Quantity to fully automate your quoting for custom merchandise products.
