🧾 Setting Up Printing Cost (SC-Sheet / SC-Packaging)
Every print job has two essential sides of cost — material and printing.
This tutorial focuses on setting up Printing Cost for SC-Sheet and SC-Packaging products — covering everything from print sides to color types and page-based logic.
🔹 What Is Printing Cost?
The Printing Cost component defines how much it costs to print on each material — based on ink coverage, print sides, and method.
For sheet-based or packaging jobs, this determines how your total print price scales with quantity and layout.
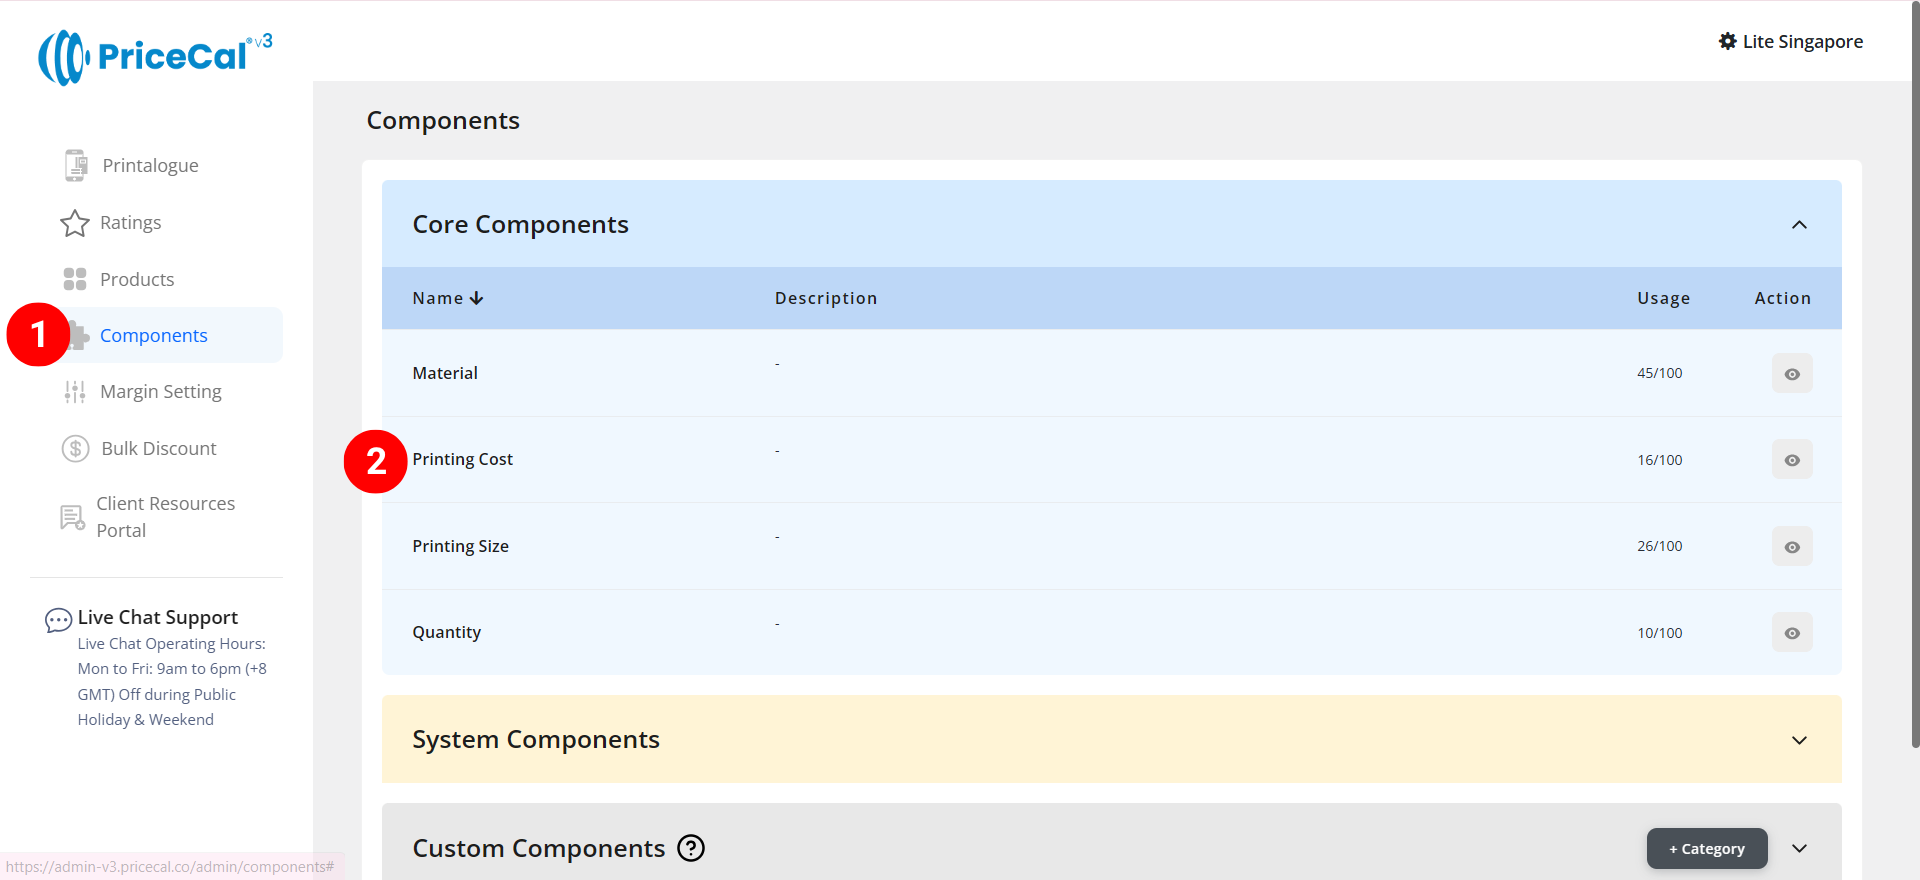
🧭 Navigating to Printing Cost Setup
- Go to Component dashboard
- Click Printing Cost category

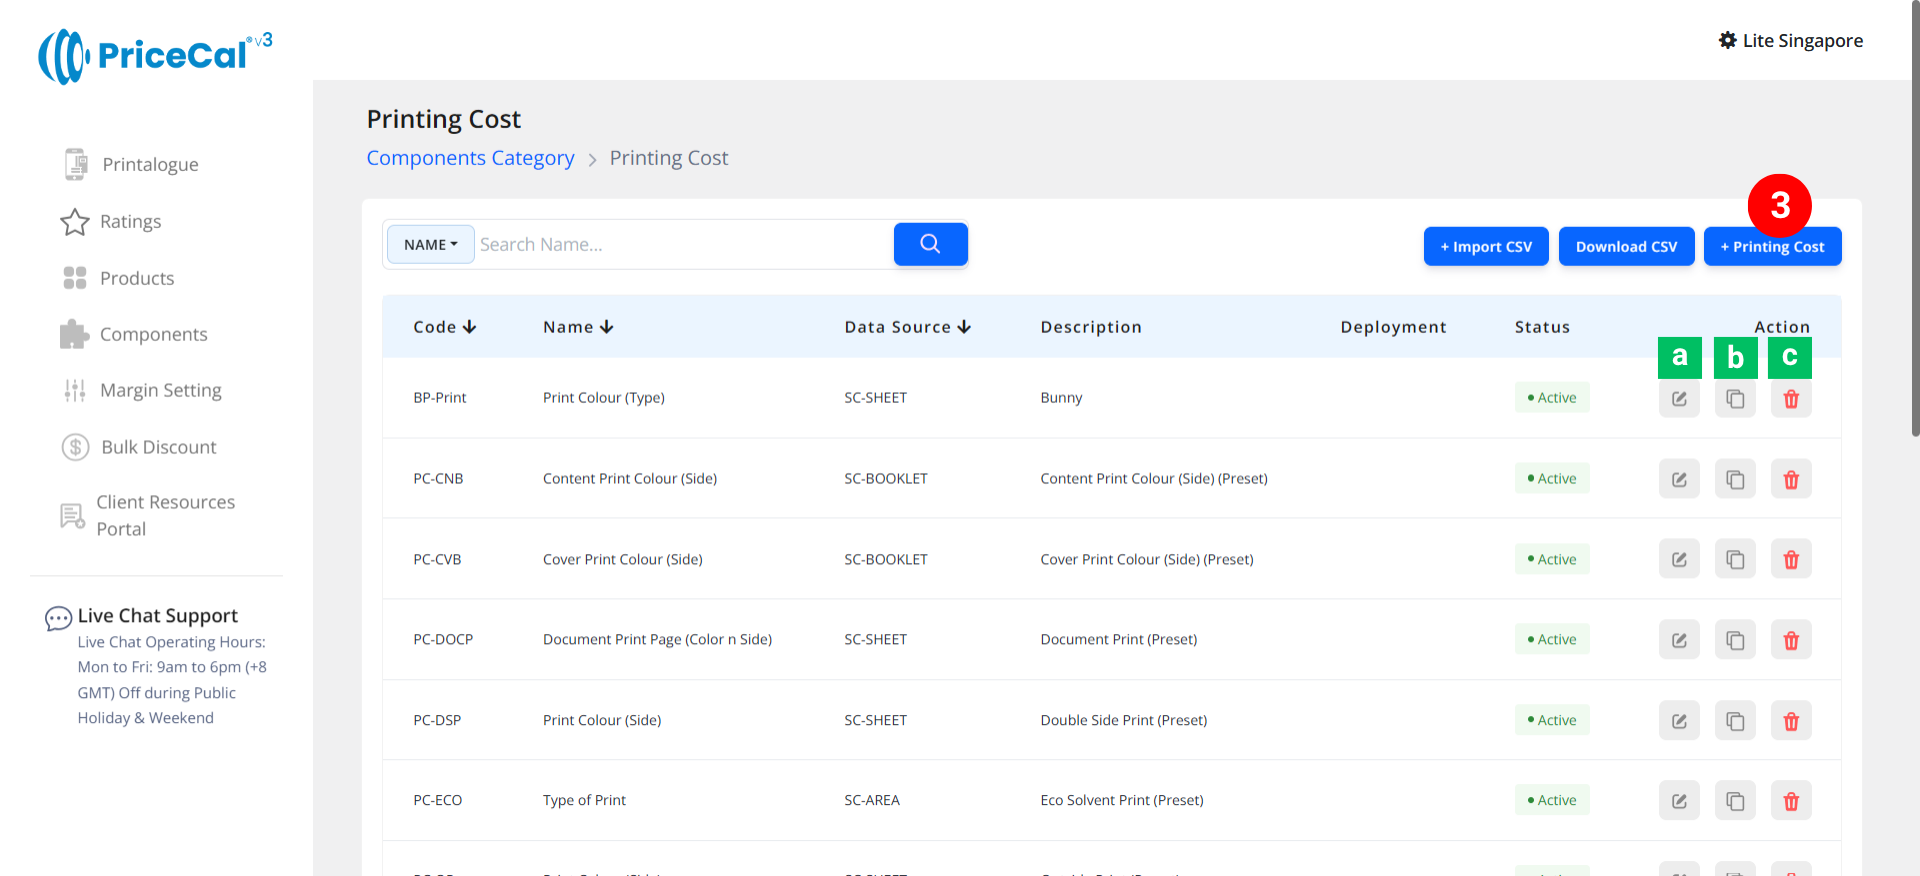
- Add Printing Cost
Edit [a]: modify existing components.
Duplicate [b]: clone a component setup to reuse and create new.
Delete [c]: remove unused component.
🧱 Create a Sheet Form Printing Cost (SC-Sheet / SC-Packaging)
-
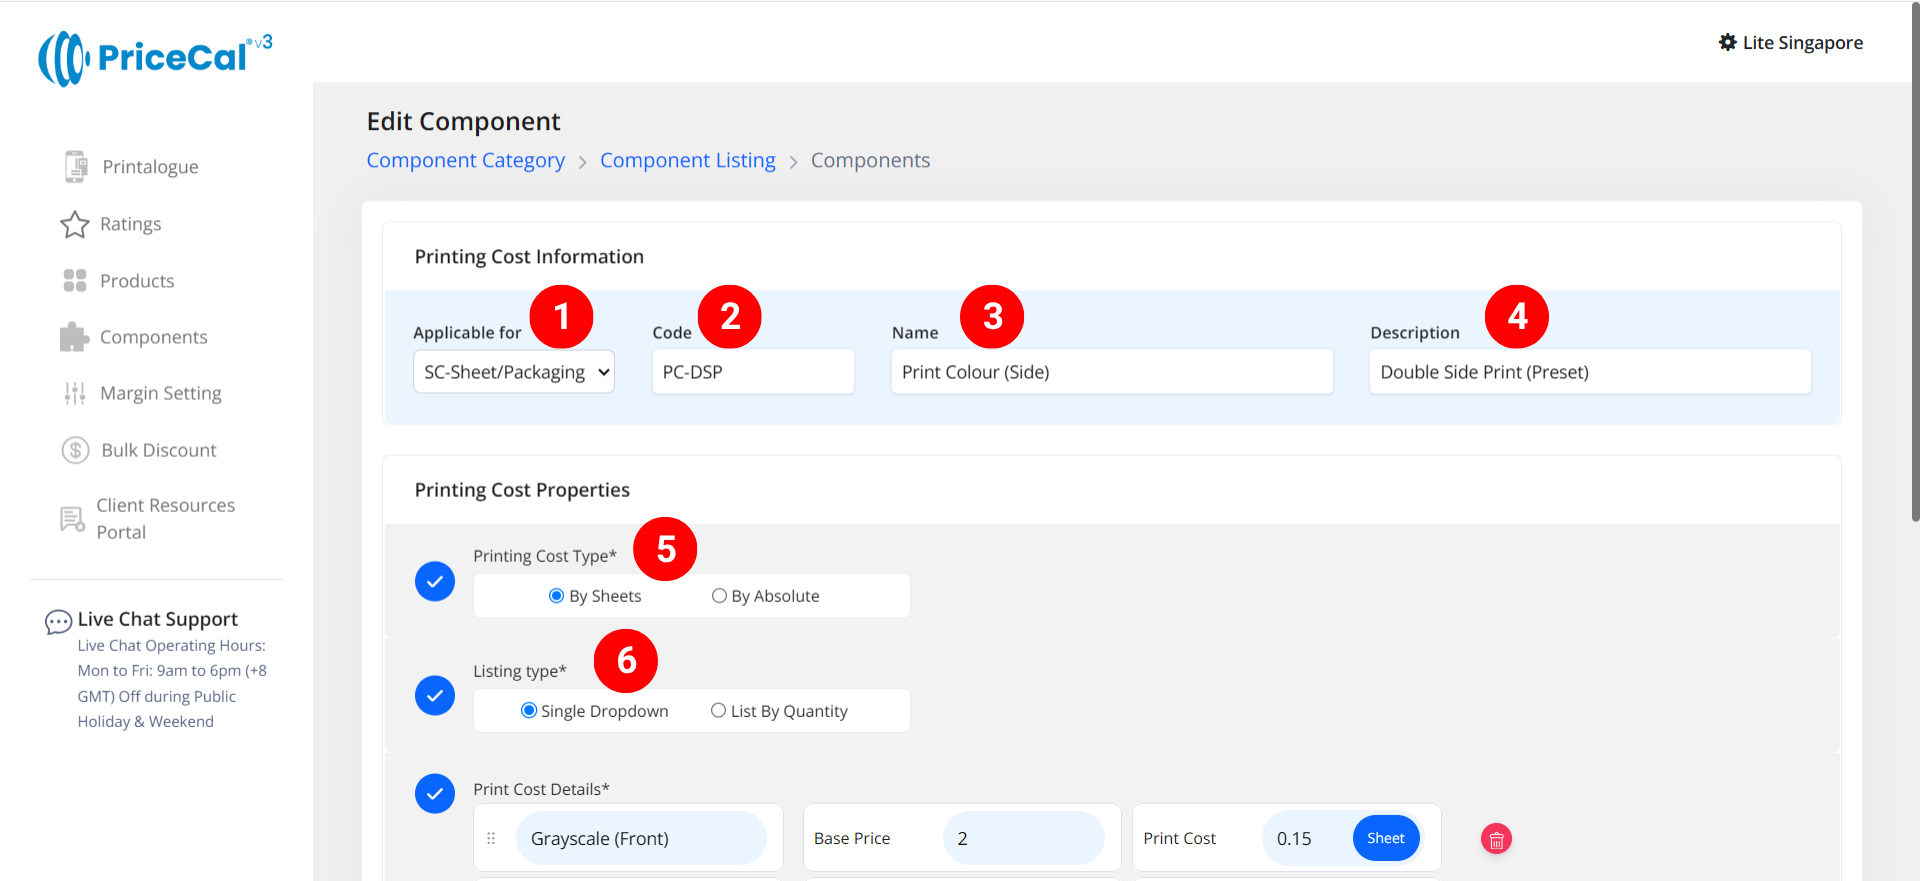
select “SC-Sheet/Packaging”
-
Put a unique code (up to 8 units)
-
Enter the printing cost name. i.e. Print Colour (Side)
-
Enter the printing cost component description. (description is important, it will help you to quickly know the information of this printing type, such as print side)
-
Select the printing cost type.
– By Sheet: calculates how many print pieces can fit within the maximum printable area of one sheet.It then multiplies the number of sheets needed by your per-sheet print cost. (total sheets required x print cost per sheet).
– By Absolute: Calculates the print cost per piece, multiplying the total print quantity by a per-piece rate. (print quantity x print cost per absolute) -
Select the listing type
– Single Dropdown: Customer can only choose one printing specification (e.g., “Single Side” or “Double Side”).
– List By Quantity: Each printing specification appears as a separate field where customers can enter page counts or quantities.(💡 Tips: Best for document or packaging jobs where color and B/W pages need separate counts.)
-
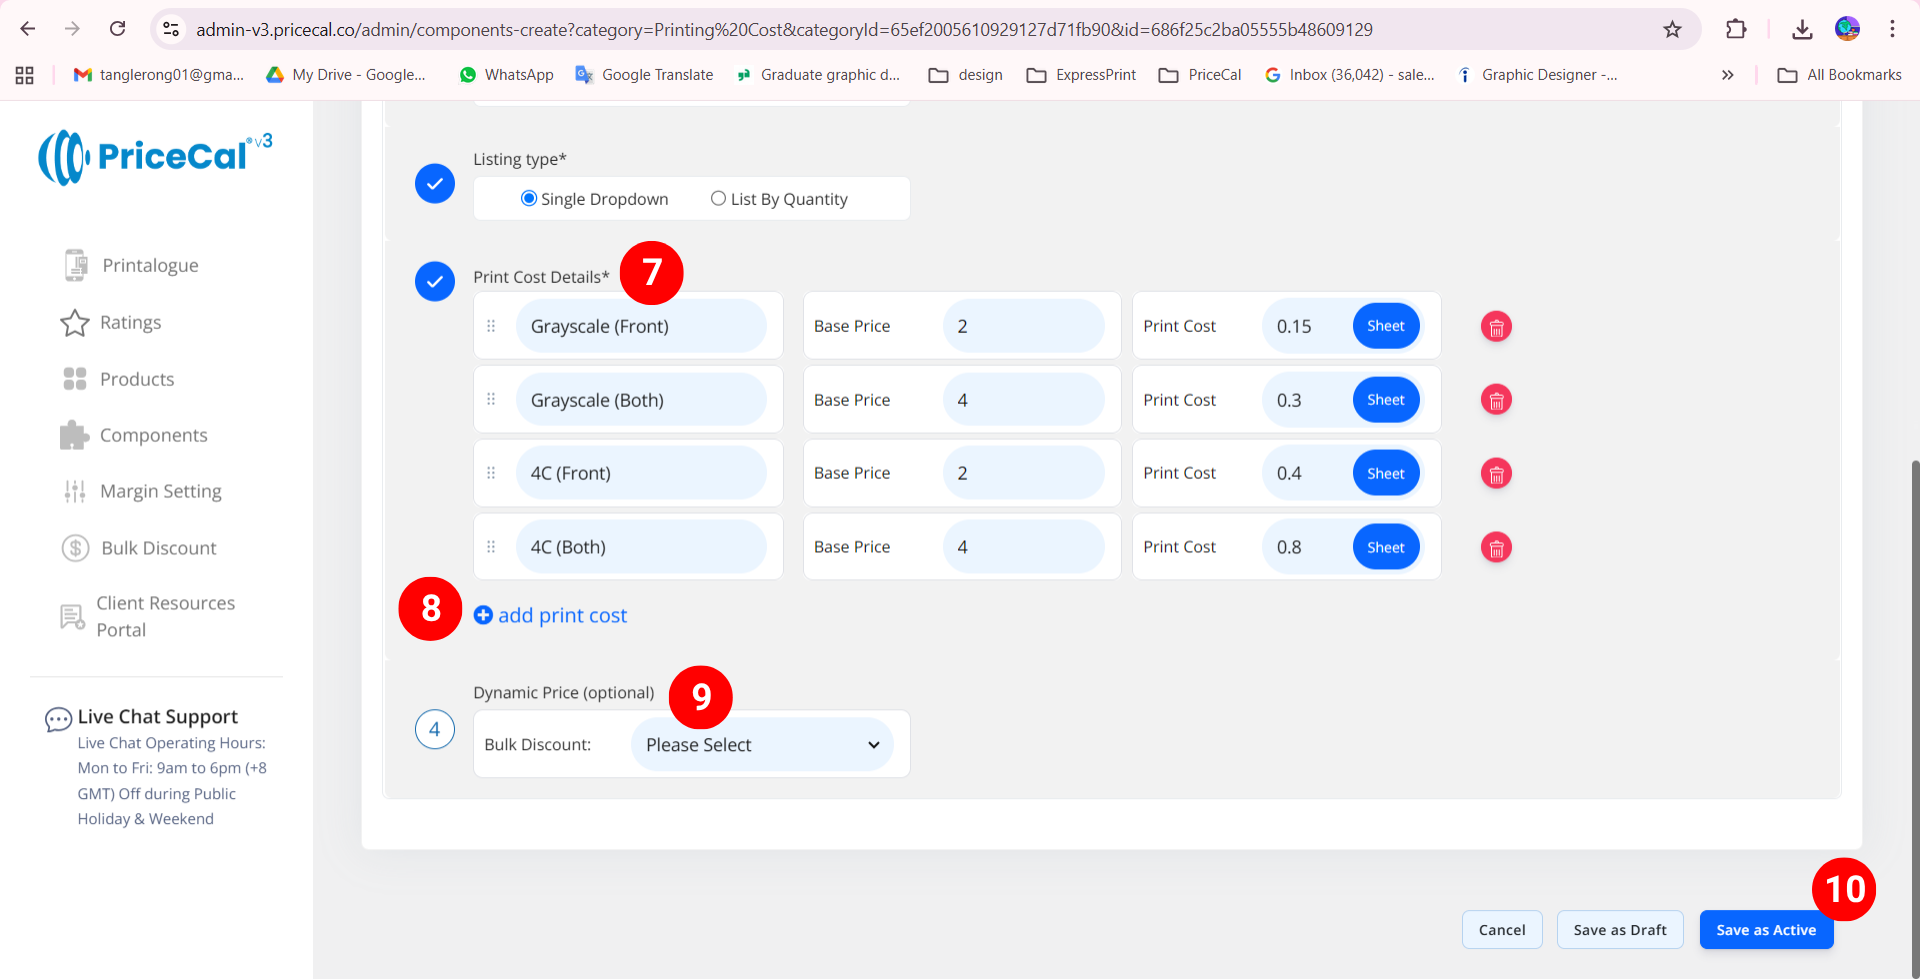
Enter the print cost detail
– Selection Name: The name of the specification customers will see (e.g., “Single Side,” “Double Side”).
– Base Price: This is the startup price. Regardless of the number of copies printed, there will be a one-time fixed cost for this print type first before calculate the cost per sheet.
– Per Sheet: Cost per sheet of print cost. i.e. Ink Cost (used when “By Sheet” is selected).
– Per Absolute: Cost per piece of print quantity (used when “By Absolute” is selected). -
Add print cost if you have other specifications available for your customers to choose from
-
(optional) Set a Bulk Discount. If no need, just keep it in “Please Select”
Tips: When the cost per sheet of paper you entered is higher than the original cost, you can offer a bulk discount to bring the paper cost back down when printing volumes are large, thus preventing the paper cost from becoming too high. -
Click “Save as Active” to finalize your printing cost setup.

⚙️ How PriceCal Calculates Printing Cost
When customers place an order:
-
The system identifies how many sheets (or pieces) are needed.
-
It multiplies by your per-sheet / per-absolute cost.
-
Adds your base price once per job.
-
Displays the total printing cost automatically in real time.
✅ This ensures your cost remains accurate, consistent, and scalable regardless of print quantity or product type.
🎯 Why This Setup Is Important
Accurate printing cost setup allows you to:
-
✅ Reflect real press cost and efficiency
-
✅ Offer correct pricing for both small and bulk jobs
-
✅ Maintain stable profit margins
-
✅ Simplify updates for different packaging print methods
Together with Material, Size, and Quantity, the Printing Cost forms one of the “Four Heavenly Kings” — the foundation of smart print pricing in PriceCal.
✅ Next: Configure Printing Size or Quantity
After completing your printing cost setup, continue to define Printing Size and Quantity to fully automate your quote and sales workflow.
