📏 Setting Up Printing Size (SC-Area)
The Printing Size component defines the printable area and dimensional rules for large-format products like banners, posters, wall stickers, and foam boards.
This setup ensures your pricing engine calculates the right area, applies correct nesting logic, and handles custom or oversize jobs accurately.
🔹 What Is Printing Size?
In SC-Area, the printing size determines:
-
The available print dimensions for each product,
-
The base setup cost per size,
-
And how nesting and wastage are calculated based on material width and print layout.
This setup is essential for accurate area-based pricing and efficient material usage.
🧭 Navigating to Printing Size Setup
- Go to Component dashboard
- Click Printing Size category
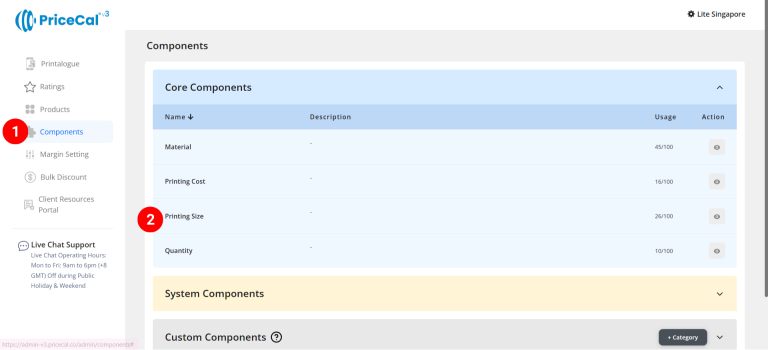
- Add Printing Size
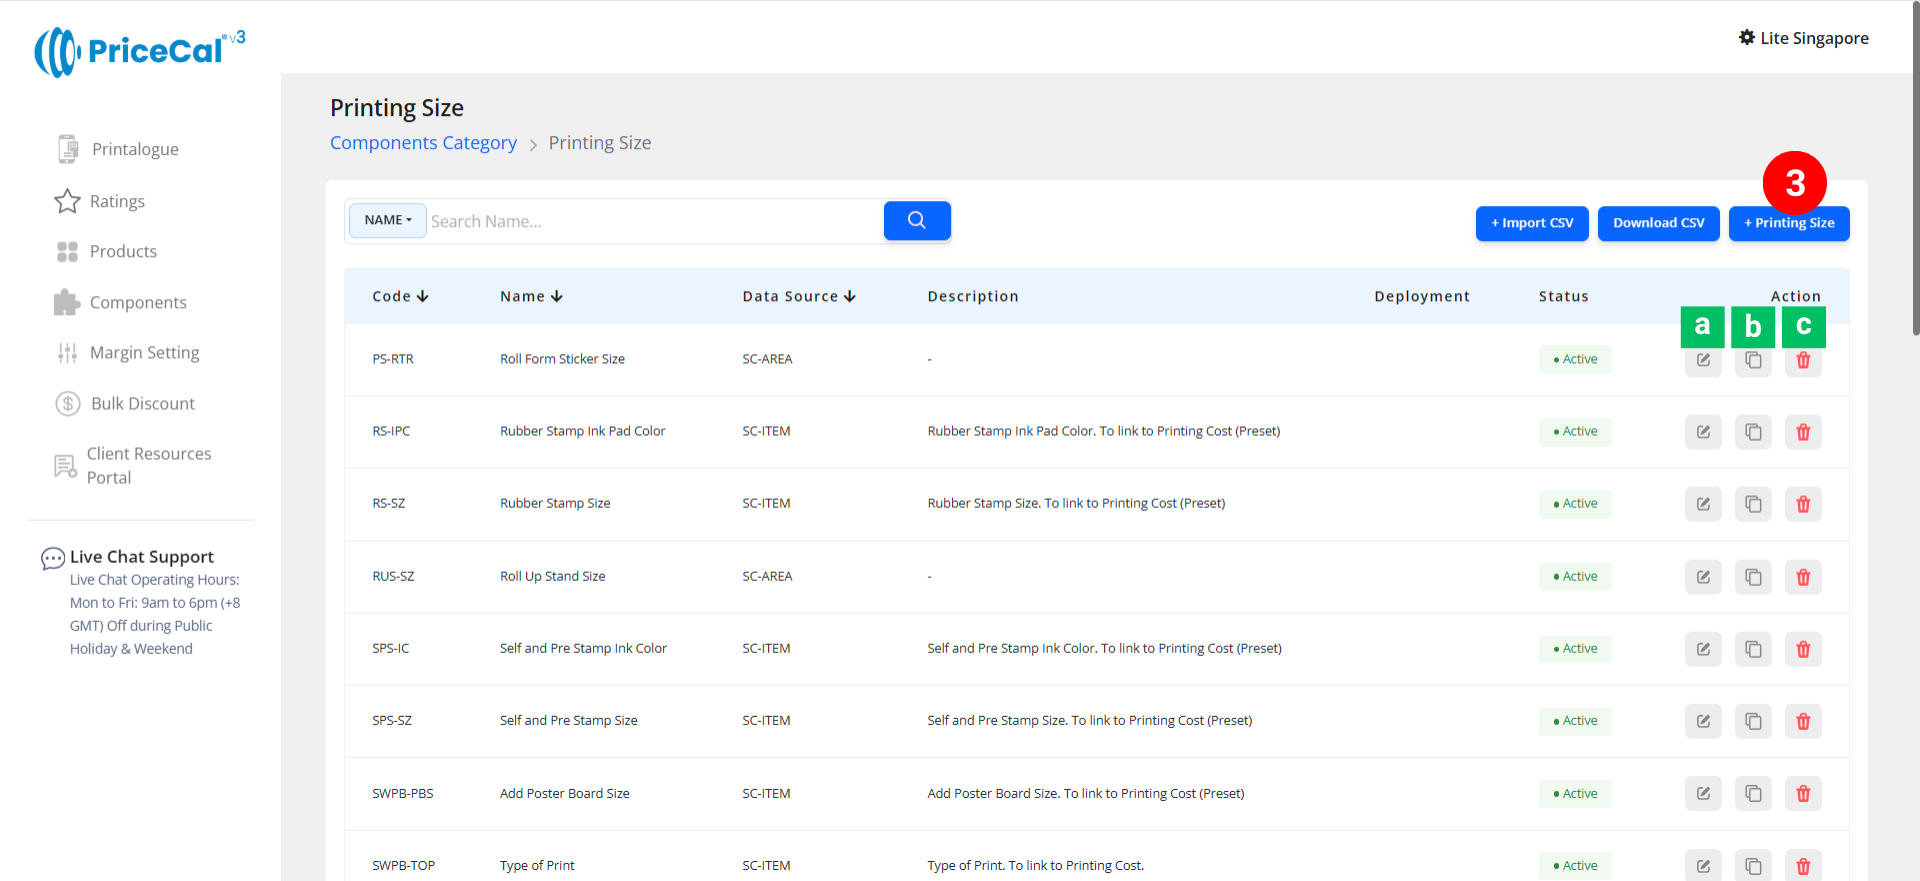
Edit [a]: modify existing components.
Duplicate [b]: clone a component setup to reuse and create new.
Delete [c]: remove unused component.


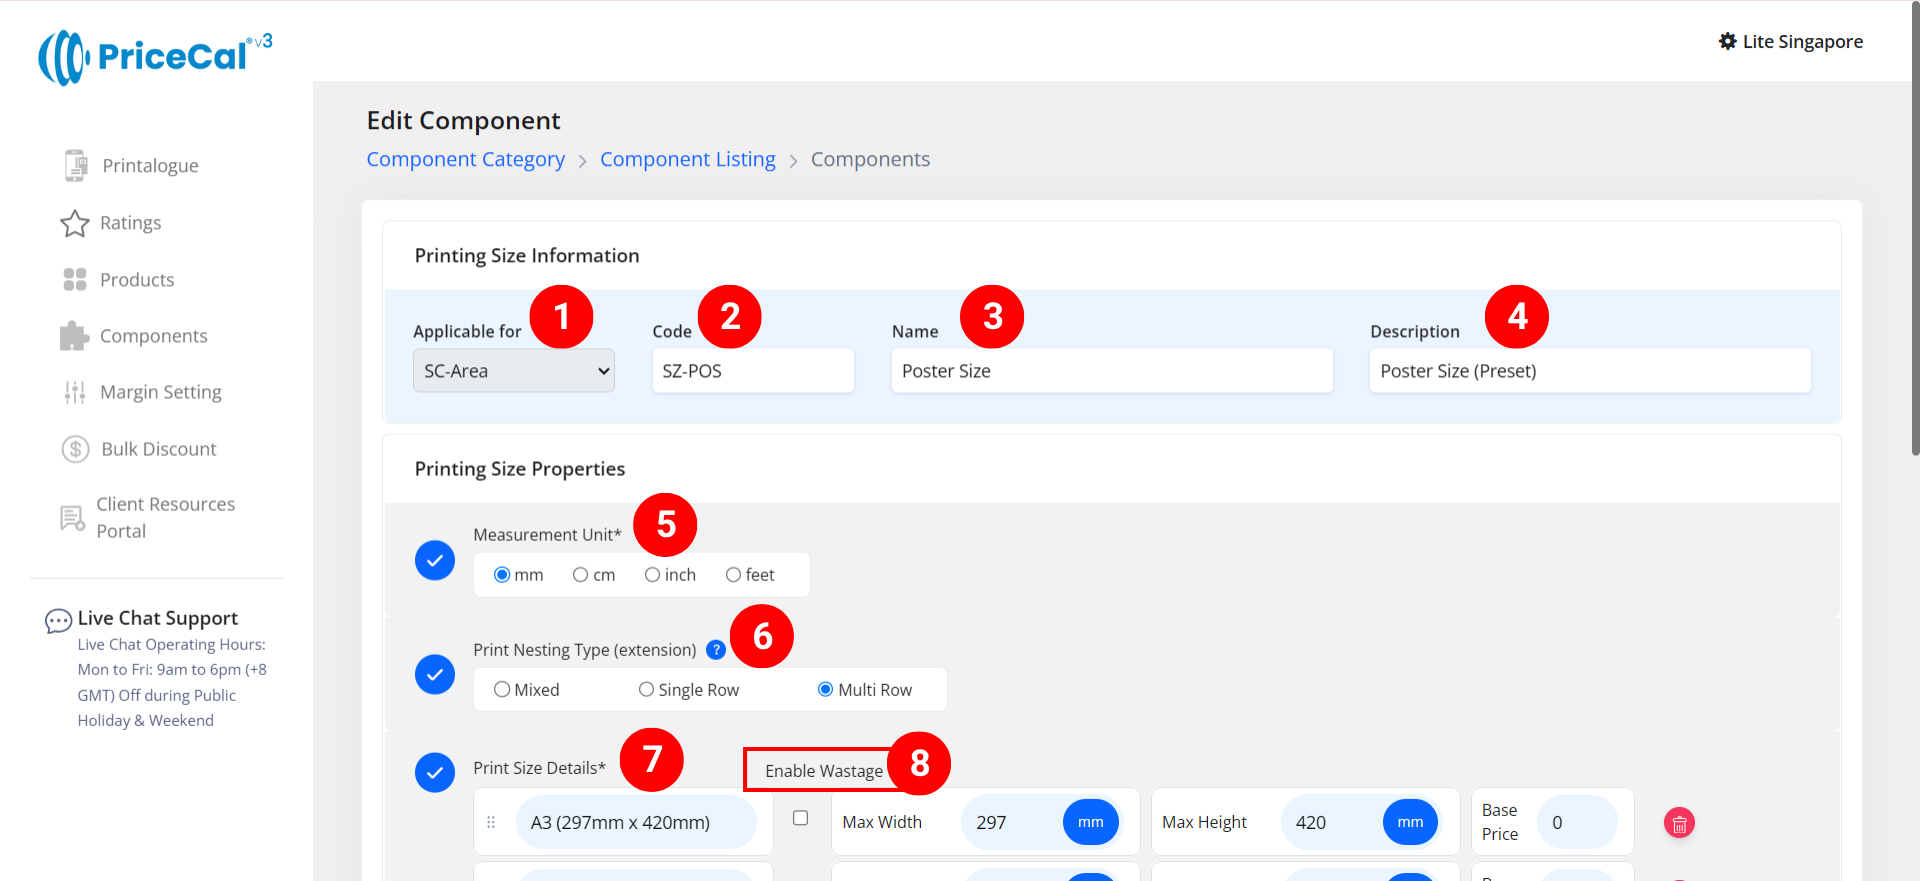
🧱 Create an Area-Based Printing Size (SC-Area)
Step-by-Step
-
select “SC-Area”
-
Put a unique code (up to 8 units)
-
Enter the printing size name. i.e. Poster size
-
Enter the printing size component description. (💡 Note: Add a short note to describe this product type/size, such as “Large format poster”. This helps you easily identify it later.)
-
Select measurement unit
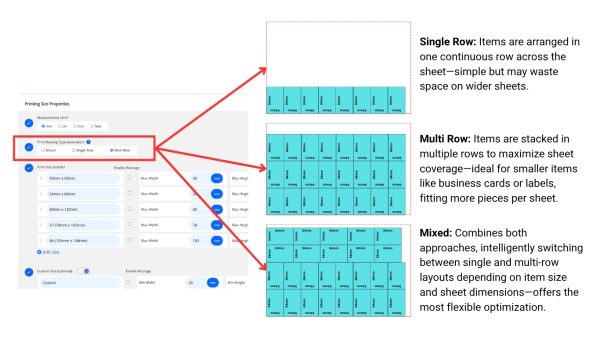
- Select Print Nesting Type (extension).
-
Enter the print size detail
– Size Label: Size shown to customer. e.g., “A3 (297mm x 420mm)” or “2ft × 6ft”
– Max Width & Height: Input size numbers to match the size label
– Base Price: One-time setup or startup fee before any per-sqft cost applies. -
(optional) Tick the “Enable Wastage” if you want to include material wastage in your cost calculation
Wastage Formula:
Wastage Area = (Material Max Width − Print Width) × Print Height (in sqft)
Wastage Cost = Wastage Area × Wastage Cost per Sqft

- Add print size if you have other print sizes available for your customers to choose from
-
(optional) Turn on Custom size if you able to print the product with custom size
– Min Width & Height: Enter the min size that can be printed and cut for this product size.
– Base Price: can add a One-time setup or startup fee for the custom size print service - (optional) Turn on Oversize if the product can be printed in sections and combined. i.g. wall sticker print, foam board print
– Base Price: can add a One-time setup or startup fee for oversize handling or joining service -
(optional) Turn on Max Size Restriction if you want to limit how large customers can order.
– Max Width & Height: Enter the maximum size that can be printed and cut. -
(optional) Enter the bleed area size. This ensures your design extends beyond the trim line and prevents white borders after cutting.
-
Click “Save as Active” to save your print size setup.


⚙️ How PriceCal Uses Printing Size
When customers place an order:
-
The system reads the selected print size (or custom input).
-
It calculates the printable area in sqft.
-
Applies the Printing Cost per sqft.
-
Adds any Base Price, Oversize, or Custom Size fees.
-
Displays the total price instantly on the customer-facing Printalogue.
✅ The result: precise pricing, efficient nesting, and realistic cost control.
🎯 Why This Setup Is Important
A well-defined SC-Area Printing Size setup allows your system to:
-
✅ Calculate costs accurately per square foot
-
✅ Support standard, custom, and oversize dimensions
-
✅ Include optional wastage and bleed control
-
✅ Ensure seamless integration with Printing Cost and Material settings
Together, Printing Size, Material, and Printing Cost form the backbone of accurate and dynamic large-format pricing in PriceCal.
✅ Next: Link Printing Cost and Quantity
After completing your printing size setup, proceed to link it with Printing Cost and Quantity components to complete your large-format pricing structure.
