📐 Tutorial: Setting Up Printing Size (SC-Sheet)
For sheet-based products like business cards, flyers, and stickers, defining the printing size ensures PriceCal calculates the correct sheet usage, nesting, and print cost automatically.
This tutorial guides you through how to set up Printing Size for SC-Sheet products.
🔹 What Is Printing Size in SC-Sheet?
In SC-Sheet, the Printing Size determines how many finished pieces can fit on a single sheet of material.
It connects with your Material and Printing Cost components to generate accurate per-sheet pricing and ensure efficient paper usage.
🧭 Navigating to Printing Size Setup
- Go to Component dashboard
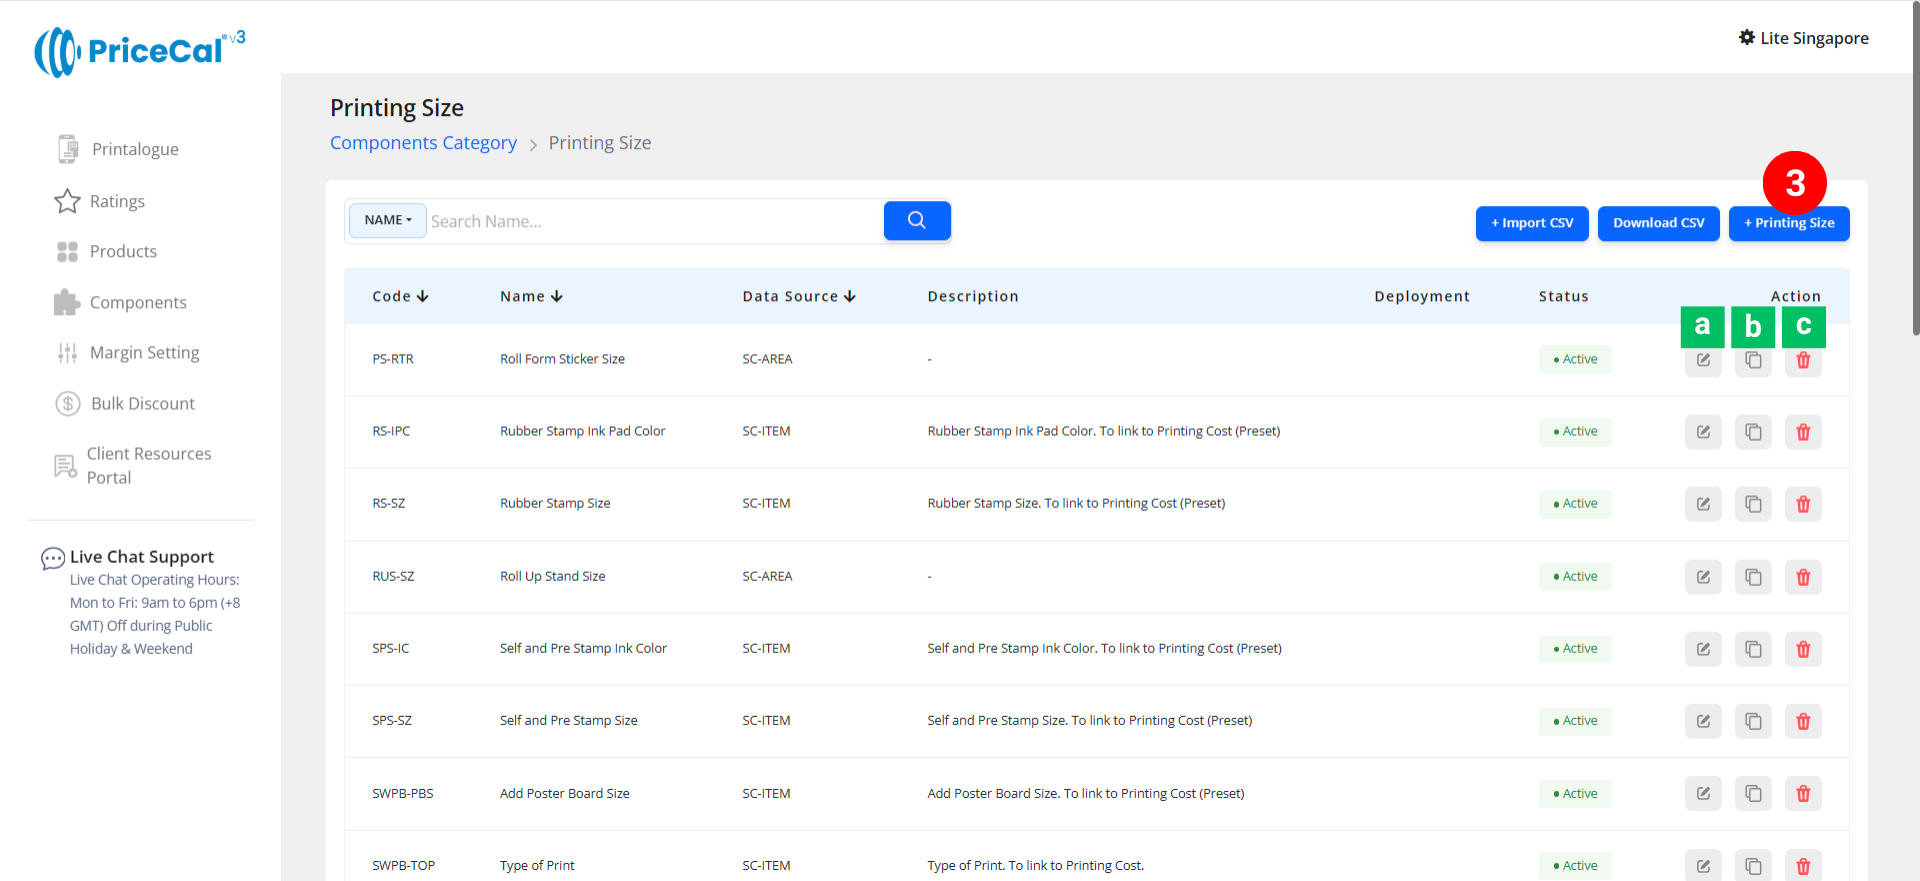
- Click Printing Size category
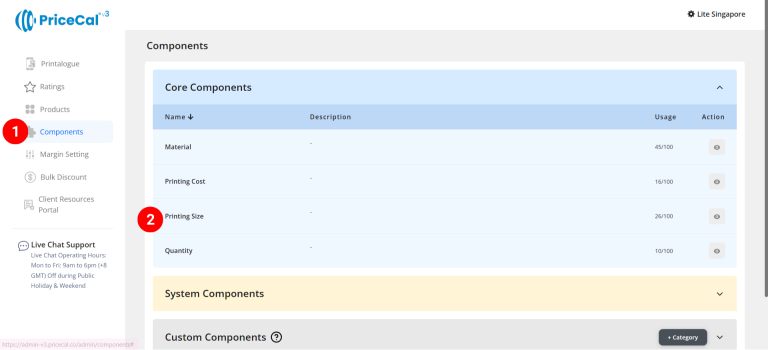
- Add Printing Size
Edit [a]: modify existing components.
Duplicate [b]: clone a material setup to reuse and create new.
Delete [c]: remove unused component.


🧱 Create a Sheet-Based Printing Size (SC-Sheet)
Step-by-Step
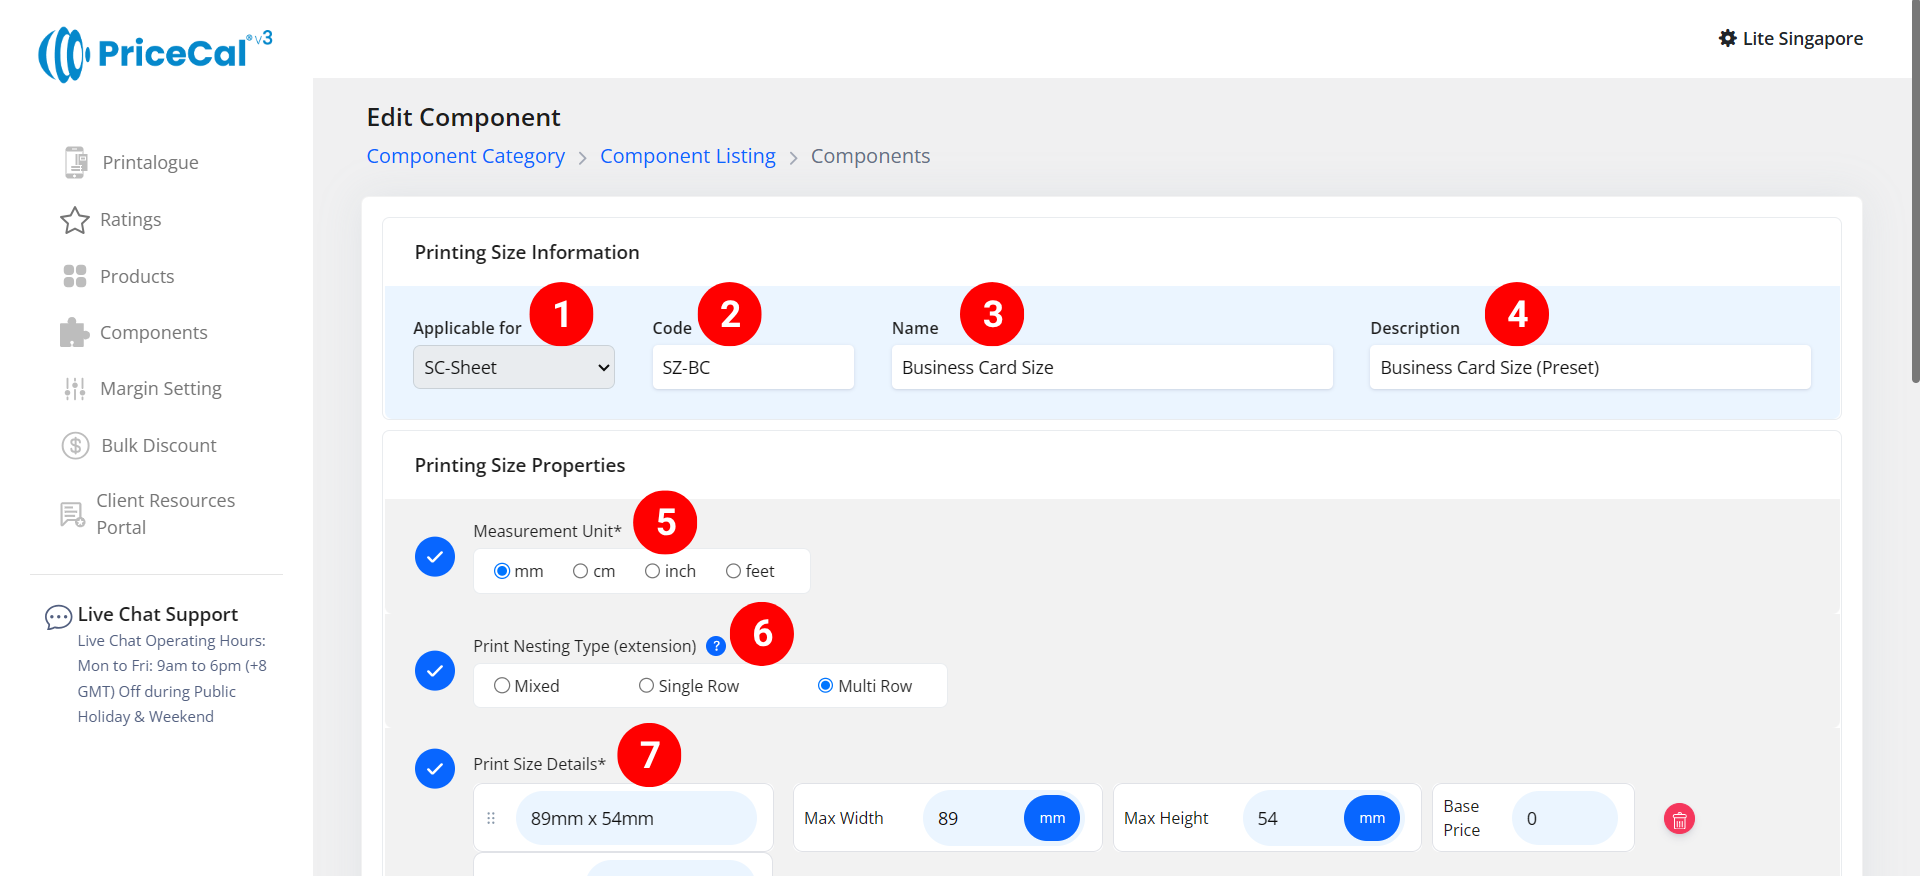
- select “SC-Sheet”
-
Put a unique code (up to 8 units)
-
Enter the printing size name. i.e. Business Card size, Flyer size
-
Enter the printing size component description. (💡 Note: Add a short note to describe this product type/size, such as “business card size”. This helps you easily identify it later.)
-
Select measurement unit
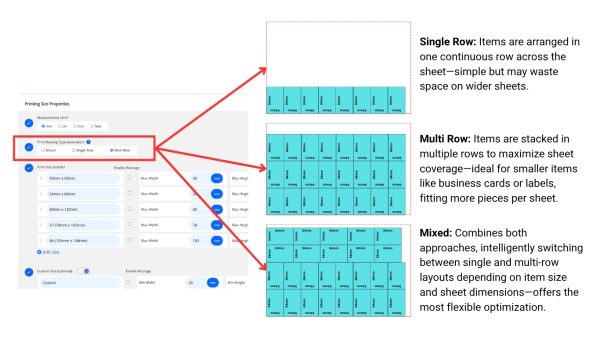
- Select Print Nesting Type (extension).
-
Enter the print size detail
– Size Label: Size shown to customer. e.g., “A3 (297mm x 420mm)” or “89mm x 54mm”
– Max Width & Height: Input size numbers to match the size label
– Base Price: One-time setup or startup fee before any per-sqft cost applies.

-
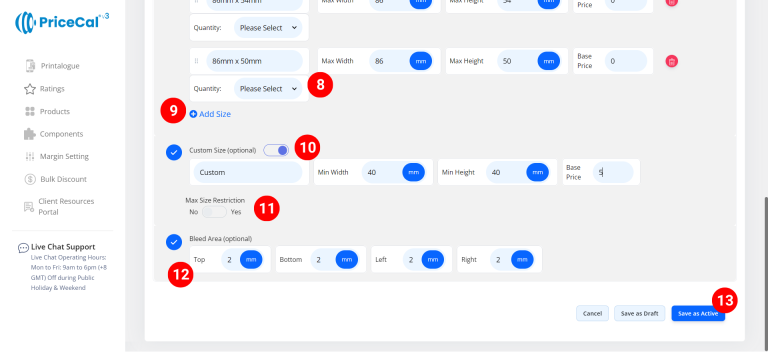
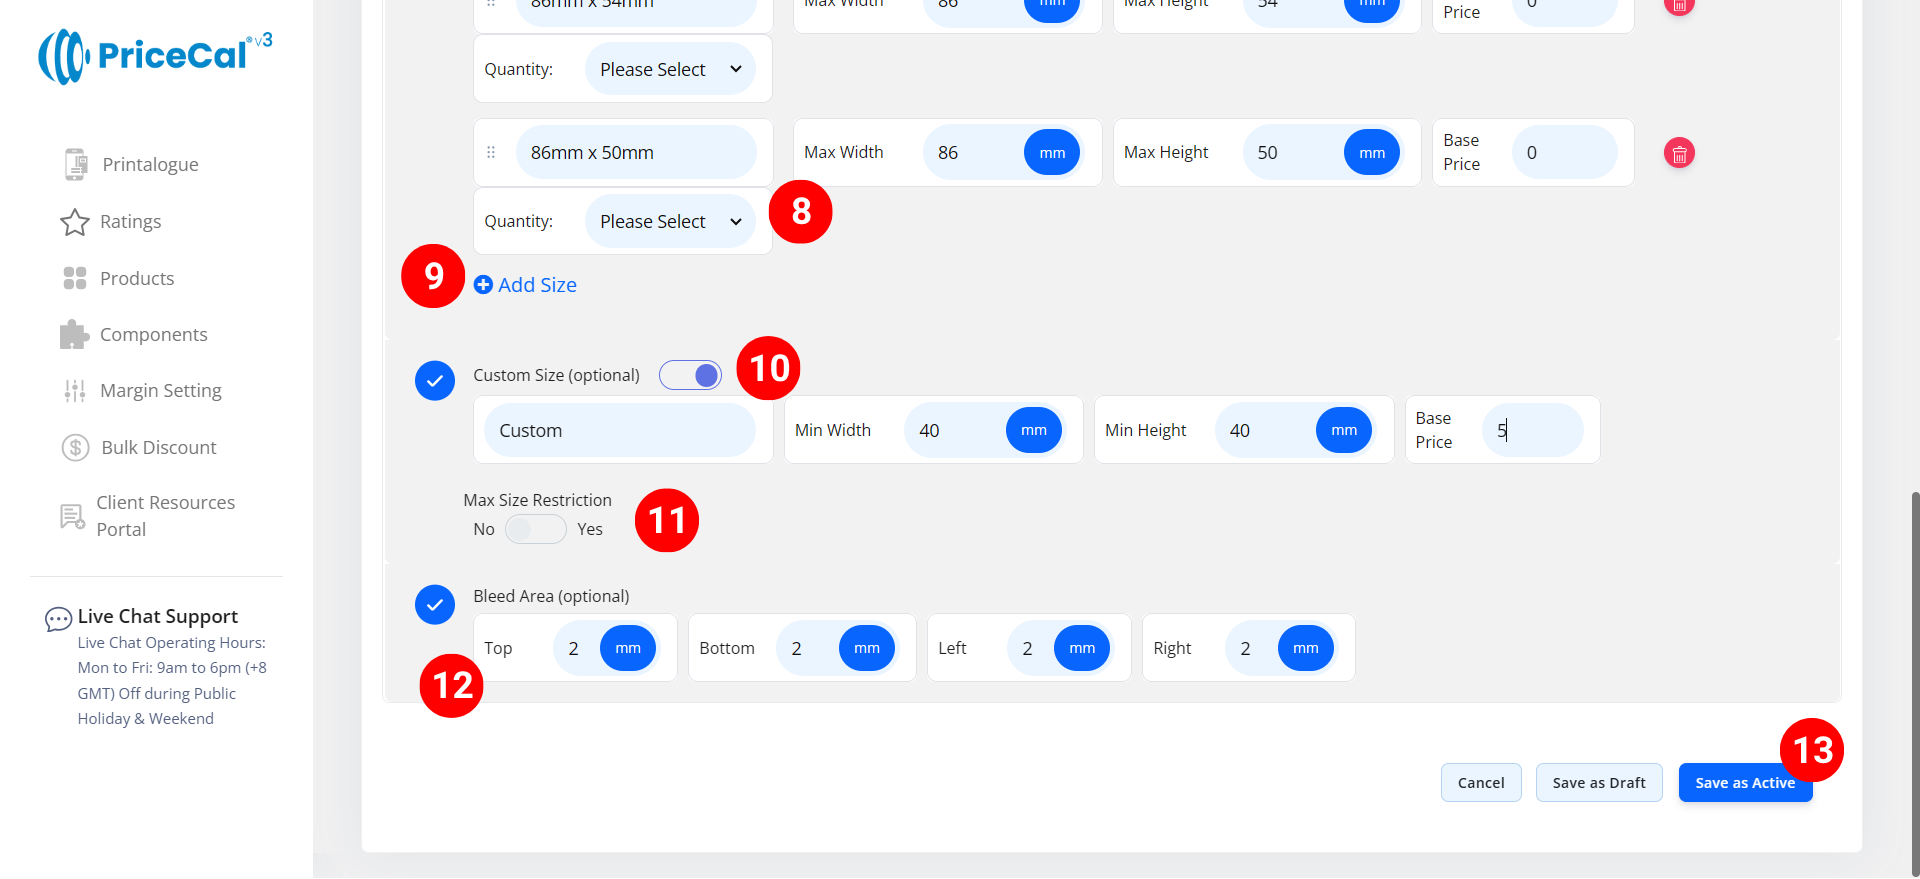
(optional) You can configure different print quantity components for different preset sizes.
💡 For example, A5 size flyer may have quantity steps of 100/200/500, while A4 size flyer might use 50/100/250. - Add print size if you have other print sizes available for your customers to choose from
-
(optional) Turn on Custom size if you able to print the product with custom size
– Min Width & Height: Enter the min size that can be printed and cut for this product size.
– Base Price: can add a One-time setup or startup fee for the custom size print service -
(optional) Turn on Max Size Restriction if you want to limit how large customers can order.
– Max Width & Height: Enter the maximum size that can be printed and cut. -
(optional) Enter the bleed area size. This ensures your design extends beyond the trim line and prevents white borders after cutting.
-
Click “Save as Active” to save your print size setup.